


Create a Blog
to Earn Online Income
Creating a blog means writing your thoughts, opinions, share your knowledge and information online with the public regularly. When your content is interesting, engaging, or useful for people, they will be your regular visitors. The better articles you will write - feeding Google -, the better positions your blog will reach in search results. It will bring more visitors, and this means more chances to make online income from your blog.
Earn Online Income with your Blog
The easiest method to earn money with your blog is to place advertisements on it. For this, register on the Google Adsense webpage.
Later, when you have more audience, you will be able to let out advertisement places on your website directly to advertisers. You can find a more detailed explanation about advertising on our dedicated Advertisement page.
You can also get income revenue if you start an affiliate business on your blog. For this, you need to make a partnership with companies that offer this option. You advertise or review their product, and if you forward any paying customer for them, you get a share from that purchase. For more details, visit our Affiliate page.
If you have a blog that is not monetized in any of the above ways but would like to ask your visitors to contribute to your costs, you can place a Patreon link on it. This way, your visitors will help your blog with the amount they want.


This post contains affiliate links. It means we get a commission if you purchase from some of the companies we advise here at no extra cost to you. Be that as it may, the advice below represents our real opinion.
How to Create a Blog?
There are different ways to create a blog. We will share one easy & fast way and some more complicated methods.
Easy & Fast Method to Create a WordPress Blog on your Domain
The simple, fast, and professional way to have your blog is the use of a ready WordPress blog template on your domain name.
For this, buy your domain name and hosting together from Hostgator or Bluehost. These are reliable and reasonably priced domain registrars and hosting providers.
Choose either of the two. Both have a one-click WordPress installer option in each of their package offers.


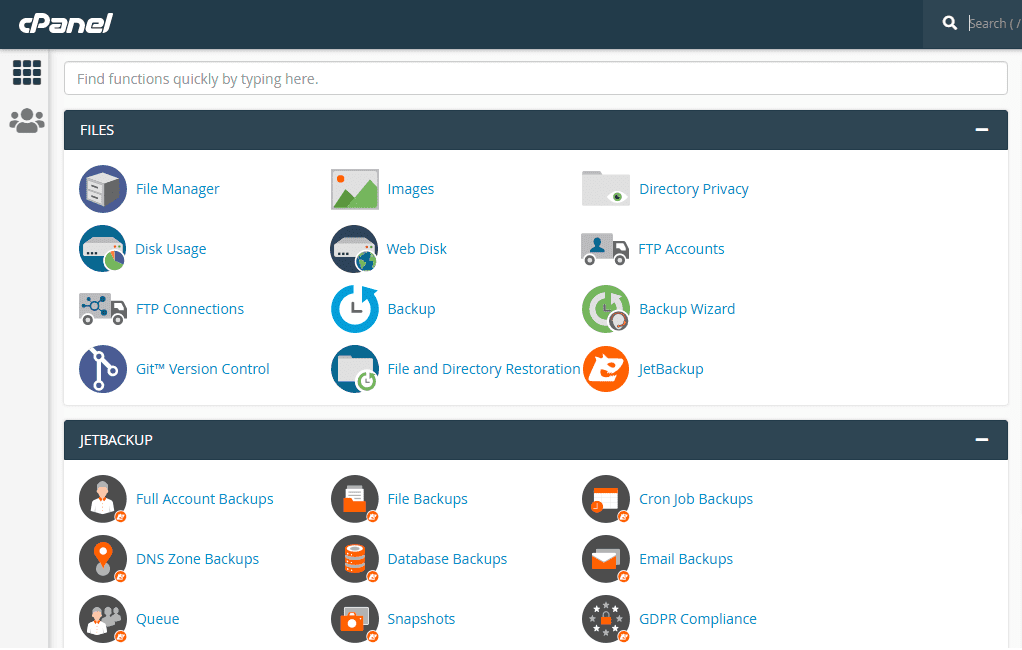
After purchasing the domain with hosting, navigate to the cPanel domain manager page of your newly bought domain. You can find your cPanel manager page if you type into your browser your domain name followed by /cpanel or: 2083
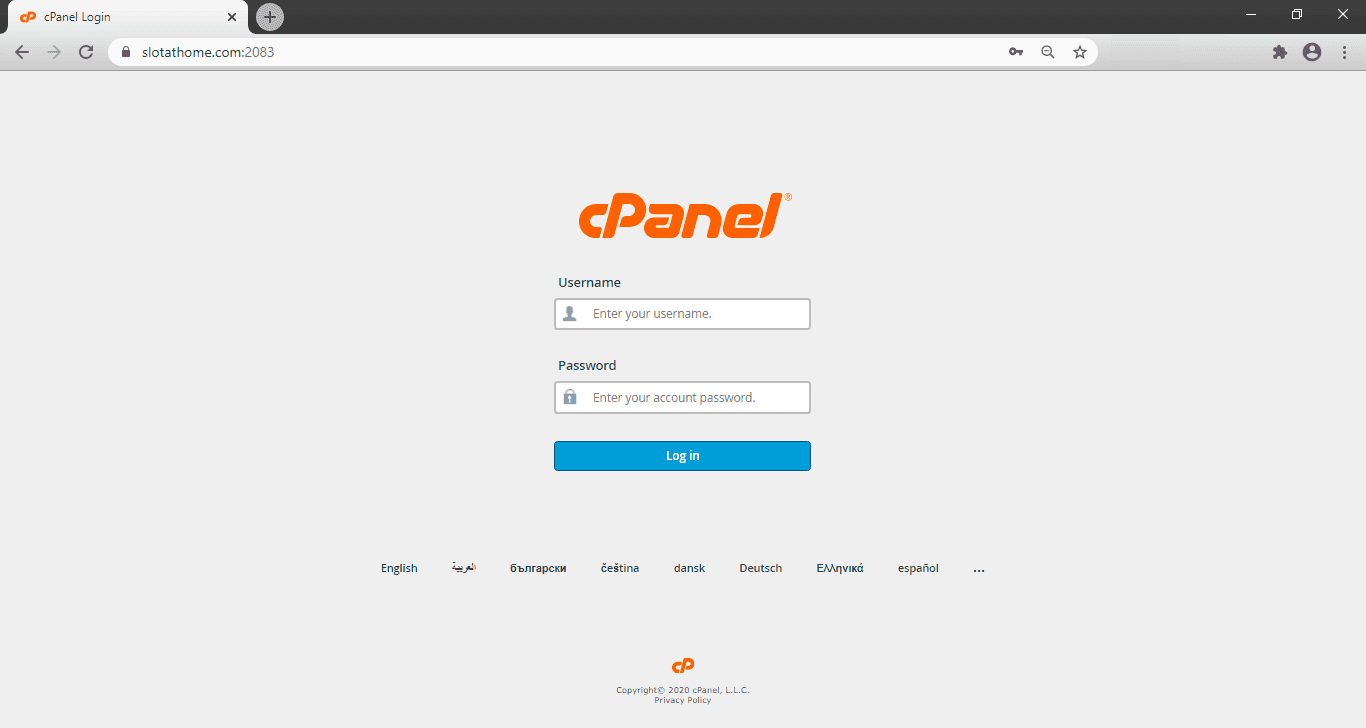
Log in to your cPanel with the username and password you have created during the domain purchase. You also received these details in an email. In cPanel, you will find the WordPress install button. It looks like this:

Click on it in your cPanel, follow the instructions there, and your blog is ready on your domain!
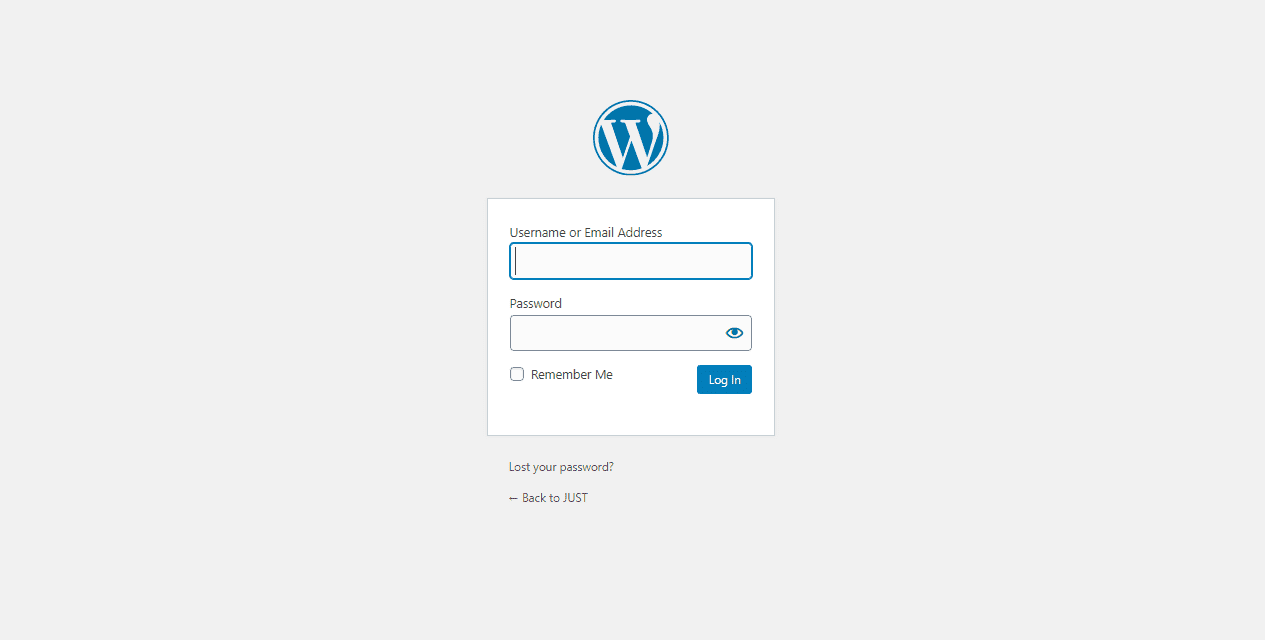
Then you can log in to the WordPress manager page with the username and password you created during installation.
To get the WordPress manager page, type into your browser your domain name followed by /wp-admin
By default, it will look like this: yourdomain.com/wp-admin
It is the default path for your WordPress manager. If you changed the default path, then obviously, you type in that.
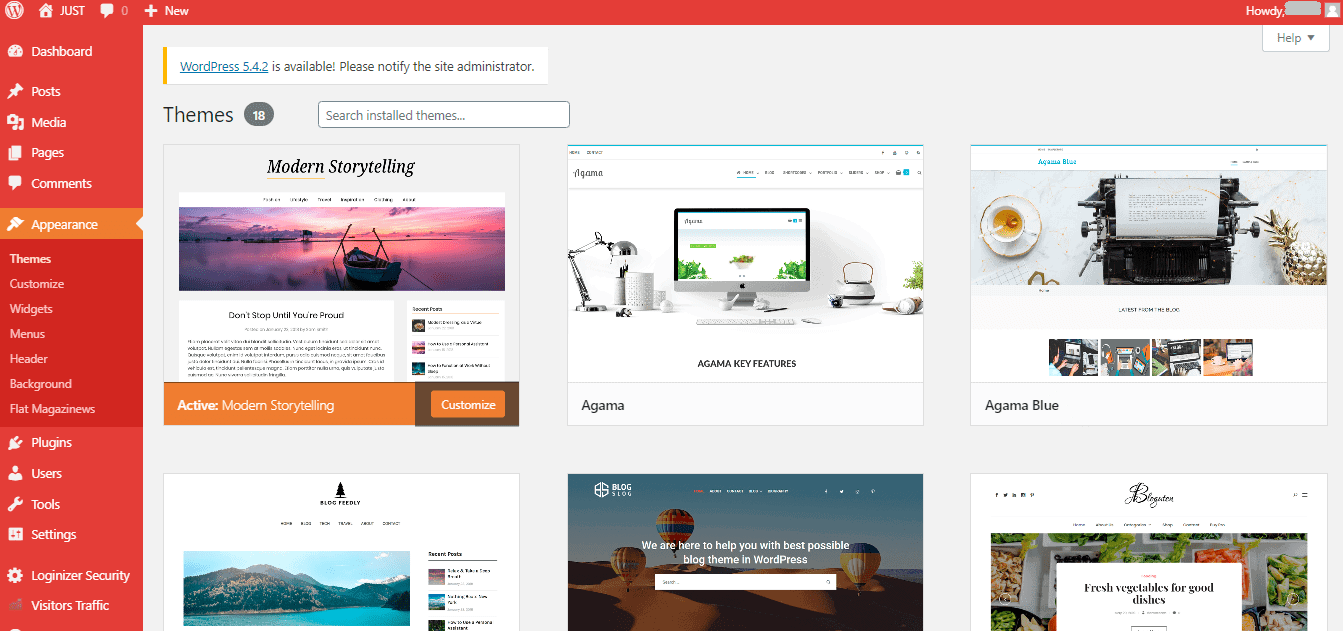
After log in to the WordPress manager page, click Appearance on the left side menu of it, then under its sub-menu Themes. It is where you can search thousands of free templates and set them up for your blog.
Browse WordPress manager menus by common sense. You are ready. You have your domain name with a WordPress blog template on it. Now you can start to write your blog. Don't forget to monetize it! For monetizing ways, click here or scroll back up.
Other Methods of Installing a WordPress Blog (for Advanced and Hobby Users)
-
Run WordPress from wordpress.com subdomain
One of the less advisable methods to start blogging for beginners is when your WordPress blog ran on the WordPress domain as a subdomain.
In this case, you set up your blog through wordpress.com's official website and choose a price plan from there. If you choose this option, you have fewer things to set up, and you can even run your blog for free, but as a downside of the free-plan, your blog will not run from your hosting. So the name will look like this: myblog.wordpress.com.
Also, they place some adverts automatically on your new blog site. You will not profit from these adverts, so you don't want to choose this.
There are paid services too at wordpress.com, but if you pay anyways, we advise you to choose the Easy & Fast Method instead.If you chose the Easy & Fast method, you don't rely on wordpress.COM in any way. Your blog name will look like any other website's name, like example.com.
-
Install WordPress on your own domain even if your hosting provider pack doesn't contain it
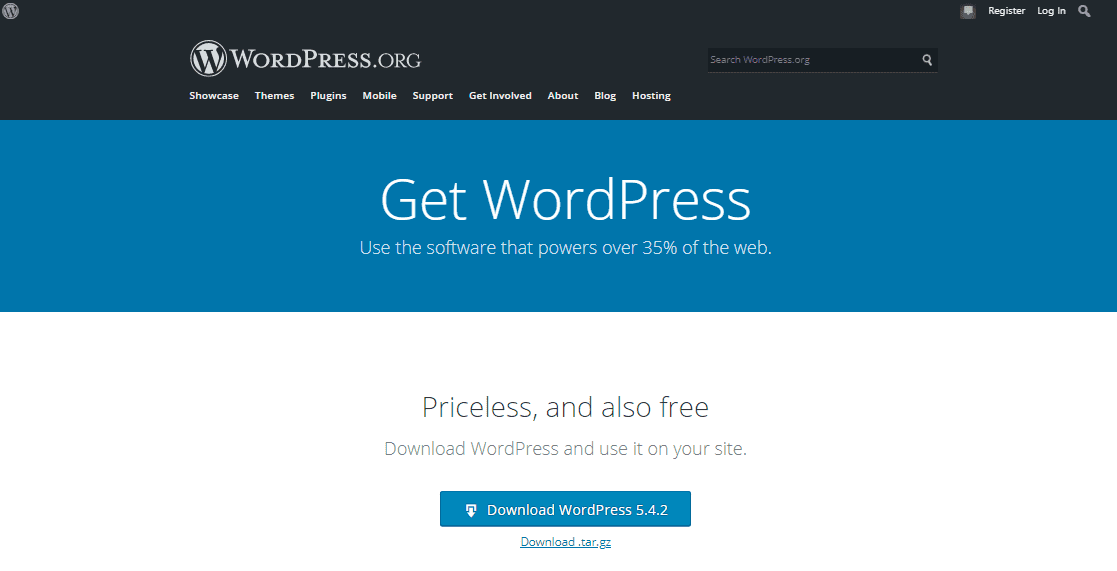
If you bought your hosting from other providers that have no WordPress installation option, or you can't find this option in your cPanel domain manager, then you can install the WordPress files from your computer. To do this, first, you need to download WordPress environment files on your computer from the wordpress.org website.
After downloading the WordPress on your computer, unzip it. Right-click on the icon and choose to unzip. Then log in to your cPanel.
When you bought a domain name and a hosting for it, you got access to a domain manager surface called cPanel. You can reach it by typing your domain name followed by /cpanel, or: 2083
You will need a username and password to log in. You got these in an email when you bought your hosting for your domain. After logging in to cPanel, you find plenty of domain settings and options. You can upload your files through cPanel, change security settings, set up email accounts, etc. If you bought your domain name and hosting from Hostgator or Bluehost, then you would find an option around the bottom of your cPanel to install the WordPress environment on your domain.
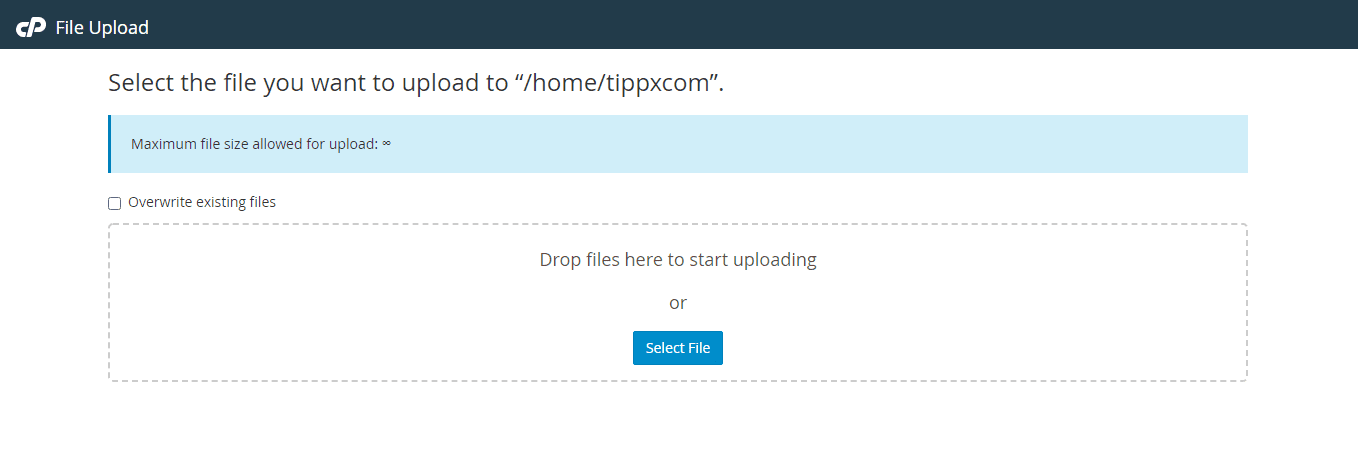
To upload WordPress files from your computer, first, locate the File Manager in your cPanel menu, then select the root directory of your domain (such as example.com) from the list on the left. By default, it is the first option on the top of the list.
Click file upload and select all the files and folders that are in your unzipped WordPress folder on your computer.
Upload all files from the folder that contains them. Then in your browser, type in your domain name, like example.com, and on the loading page, click the installation of WordPress option. This way, you have installed the WordPress environment on your domain. If you would like to read a more detailed explanation about the installation process, visit the official installation guide.
Choose a Free Template for your Blog
When you installed the WordPress environment, the system created you a login page. You can reach it usually by typing your domain name, followed by the address of the login page. By default, it is /wp-admin. So you type in something like this: example.com/wp-admin
You will see your WordPress manager login page.
Use your username and password that you created during installation to log in. As a result of doing this, the WordPress manager site appears on your screen. There, in the main menu, you can find Appearance on the left side, then under its sub-menu, Themes. It is where you can search thousands of free templates and set them up for your blog by clicking on and install them.
There you go, your blog is ready. There are plenty of settings in WordPress. Discover them, and start writing your blog.
It is pretty much all you have to know about creating your blog for now. More detailed articles will follow.