Webshop / Ebay / Amazon
as Online Income Earning Methods
This post contains affiliate links. It means we get a commission if you purchase from some of the companies we advise here at no extra cost to you. Be that as it may, the advice below represents our real opinion.
eBay and Amazon are e-marketplaces. Making business on either e-marketplace or through a webshop is e-commerce. We can call it on various names, but the basic meaning is the same in all cases:
SELLING - getting money in exchange for something.
Either way, you can sell your own things or someone else's, used, or new, physical or non-physical things. You can even sell your customers' own dreams for themselves.
Whatever you try to sell, you need a market. The biggest market on Earth is the Internet. Billions of people are connected online, so you can always find a customer for your things if you sell them at the right price. What is the right price? The basic rule of commerce says the more demand and the less supply is present in a market, you - as a seller - can get a higher price for your product.
Before we get into details about the ways you can sell online, we would like to introduce you to a game-changer concept first. If you are looking for something more than just selling your secondhand stuff from the loft, this ultimate way of selling online will be for you. It is a big one. It is called drop shipping.
If you would like to have just a simple webshop template on your domain where you sell your own stuff without drop shipping, then the same 1-3 steps apply below, and you can leave steps 4 and 5 out.
Dropshipping
Dropshipping means you make a webshop or any e-marketplace account like eBay or Amazon, then upload and sell products that you don't owe. The products belong to drop shipping companies. They usually have enormous catalogs about their products and warehouses at various locations. When a customer orders from you, the order is passed over to the drop shipping company with a few clicks. They pack the item in their warehouse and send the parcel by courier straight to the customer.
The customer pays your sale price for the product and shipping costs in your webshop. Then you pay for the drop shipping company their price and postage costs. The dropshipping company sends the product to your customer. The difference between the drop shipper's price and your sale price is your gain on the business. However, to get your customers to know about your webshop, you may need to pay for advertising it. Of course, if you promote your webshop on your own social media pages or website, you are saving money.

Creating a Webshop for Dropshipping
or Selling your own Products in it
For any webshop, you will need a domain name and hosting. You also will need a webshop template that you can get for free with WordPress-WooCommerce,
or you can pay a monthly fee for it at companies like Shopify. If you choose Shopify, that means less inconvenience but more costs.
In this case, you can skip steps 2 and 3 below and instead go on Shopify.com to install their software. From our information, it is an easy thing to do,
but we didn't try it yet. At Shopify, after a 14 day free trial period, you will have to pay a monthly fee.
Regardless of your choice (Shopify vs. WordPress-Woocommerce), you need to do steps 1, 4, and 5 that is, you will need hosting and to register at a drop shipper website and download a program that will communicate between the drop shipper site and your webshop. We will show you a free such communicating program.
Below we will walk you through the completely free WordPress-WooCommerce method.
-
Buy a domain name and hosting at Hostgator or Bluehost.
This way, you can choose any available domain name that you like, for example, abcd.com. Domain names are often free for the first year and hosting cost around $3 per month. Hosting means a place on a server for your files and folders. It is the best choice as you will control your domain name and hosting in the future.
If you don't buy your own domain and hosting, then you have to place your website files on some other company's sub-domain. In this latter case, your website address would be longer and contain other company's name too, like abcd.myshopify.com -
Install WordPress Manager (you will get a webshop template later with this)
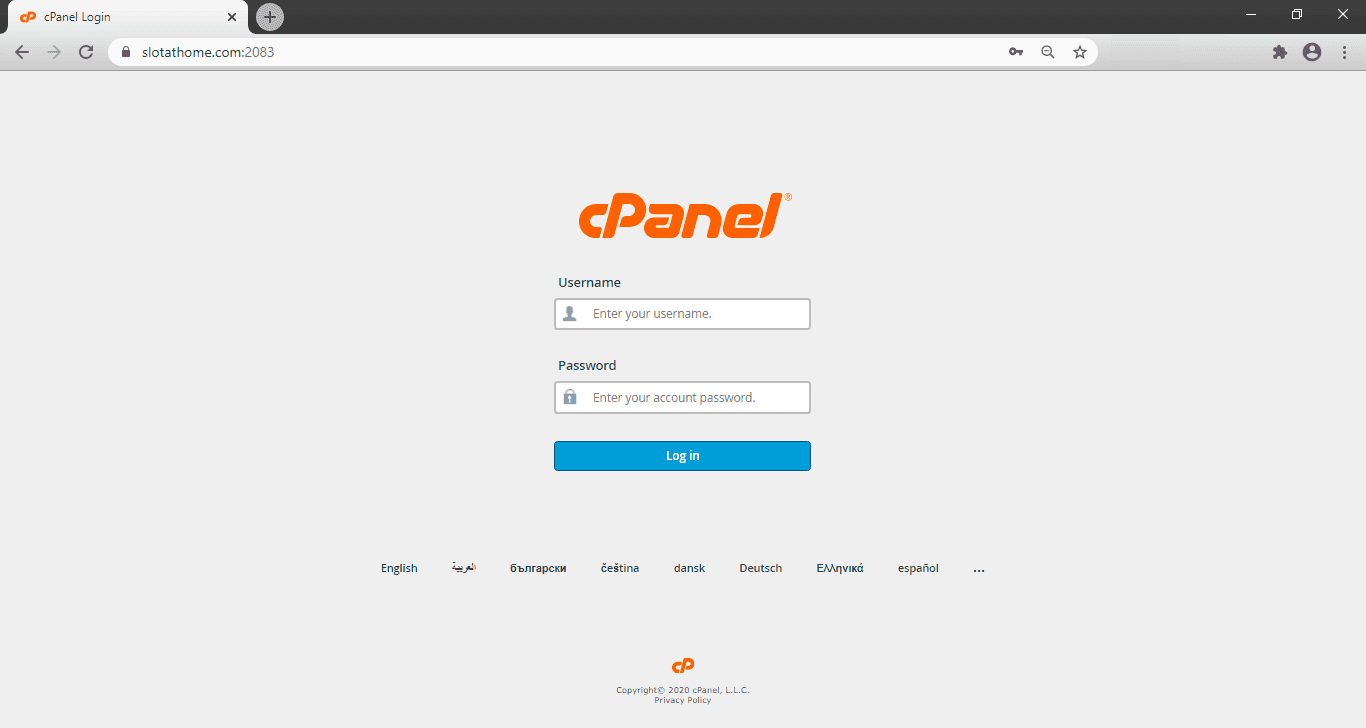
For this first log in to your recently bought hosting's cPanel. You've got the cPanel's address, username, and password in an email from your hosting provider.
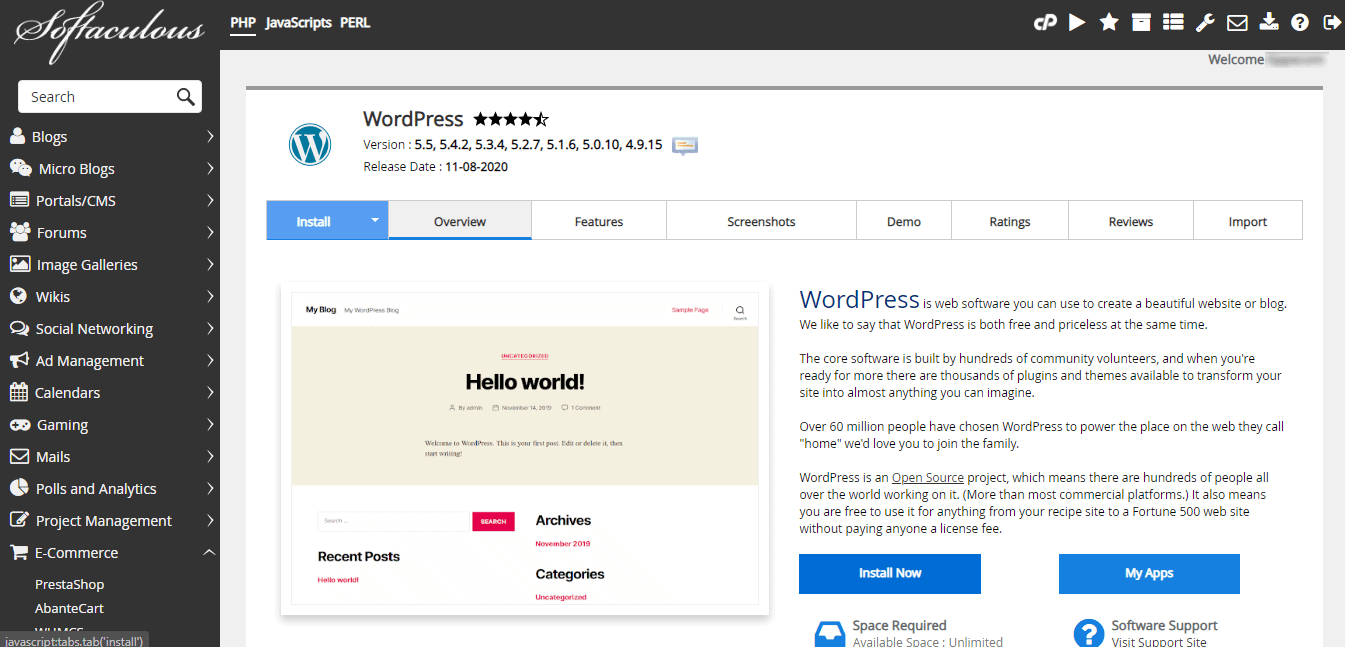
Softaculous window will open; click on either of the blue Install buttons to start WordPress installation.

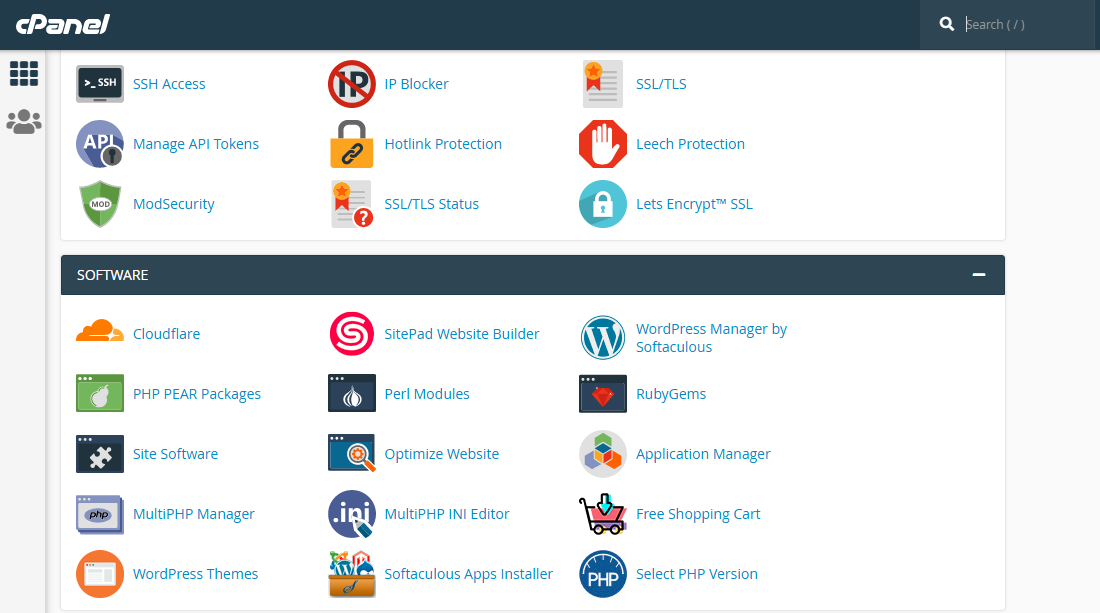
In your cPanel, scroll down until you find the WordPress Manager Installation icon.

It will look like this below. Click on it in your cPanel, and the installation will start.


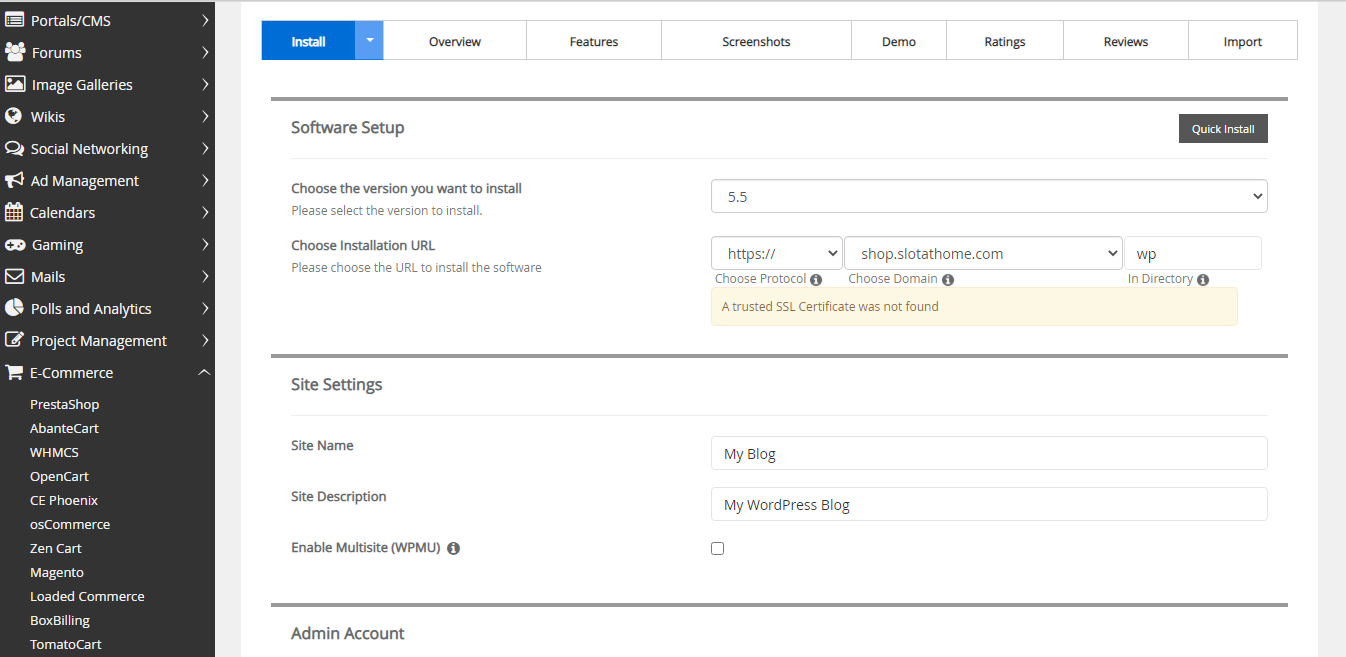
On the next page, where you can choose the installation URL, delete WP letters from the last box. This way, your website will be installed on your root domain (like abcd.com). If you left WP or anything in the Directory box, then your WordPress website would not be available on your root domain (then your website address would be like in this example: abcd.com/WP).

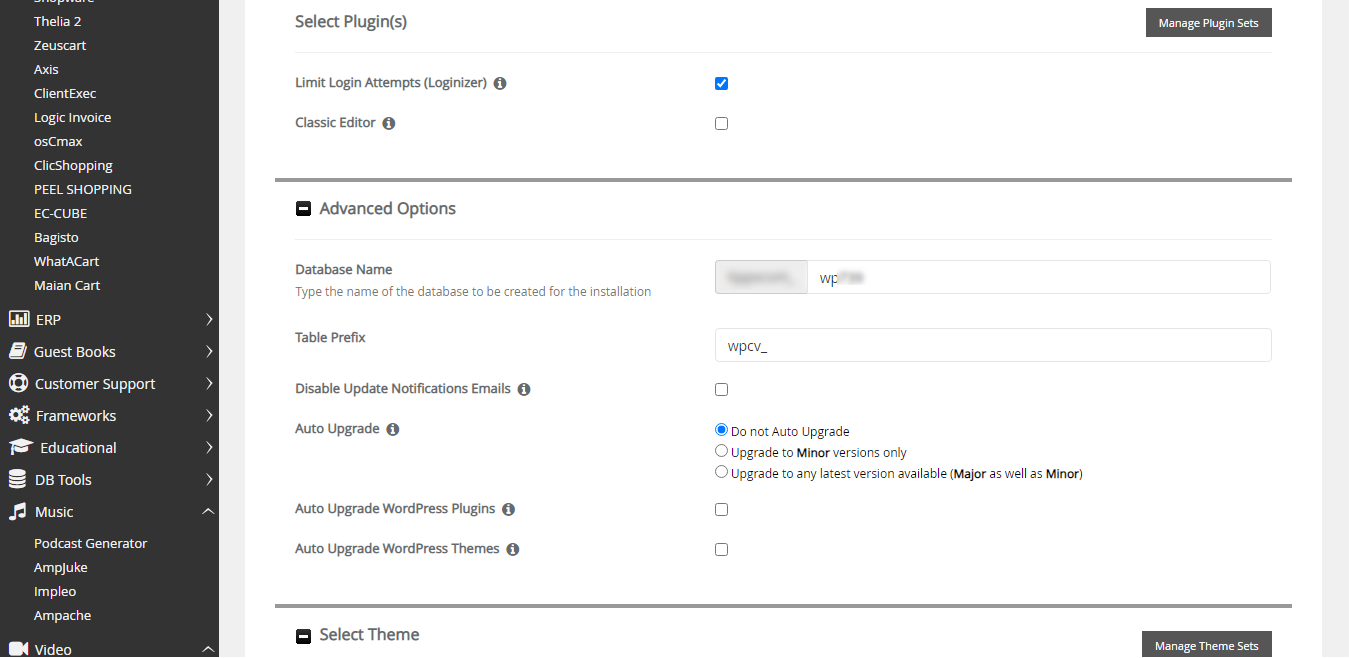
On the next page, you can tick the checkbox next to Limit Login Attempts (Loginizer). It is a useful feature. With this step, you make it harder for unauthorized people to log in to your WordPress Manager in the future. You can check the rest of the checkboxes as you wish. Here we checked to Do Not Auto Upgrade. Maybe it is better to do the upgrading manually when necessary.

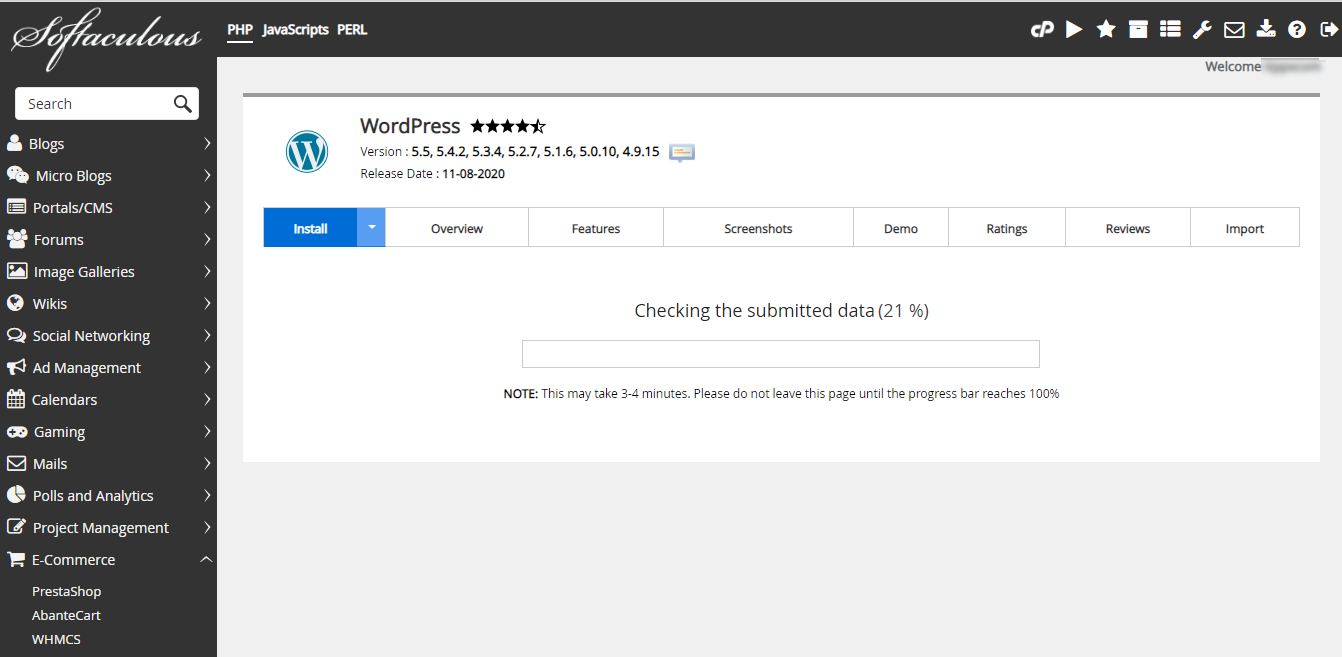
Then the installer will check data and starts the installation.

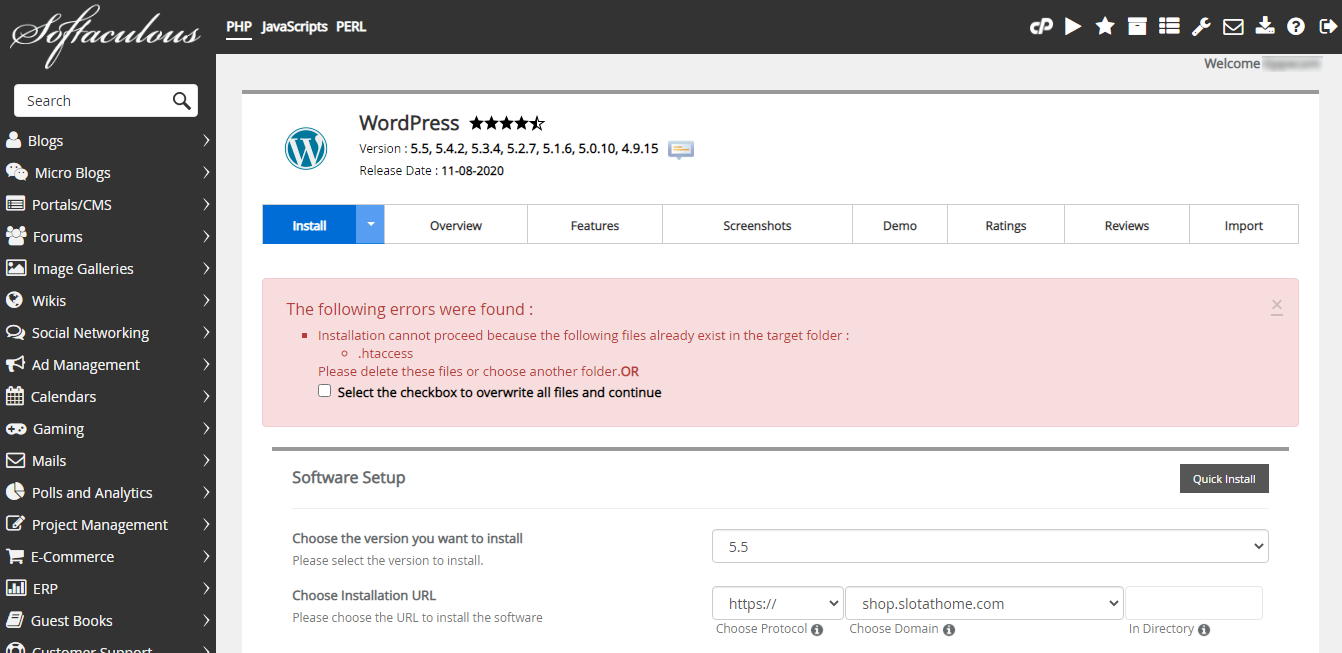
Here we had a problem, as the installation stuck because of some files found in the root directory, where new files should have copied. We can select the checkbox as it was advised in the pink warning text to overwrite the existing file and carry on installation.

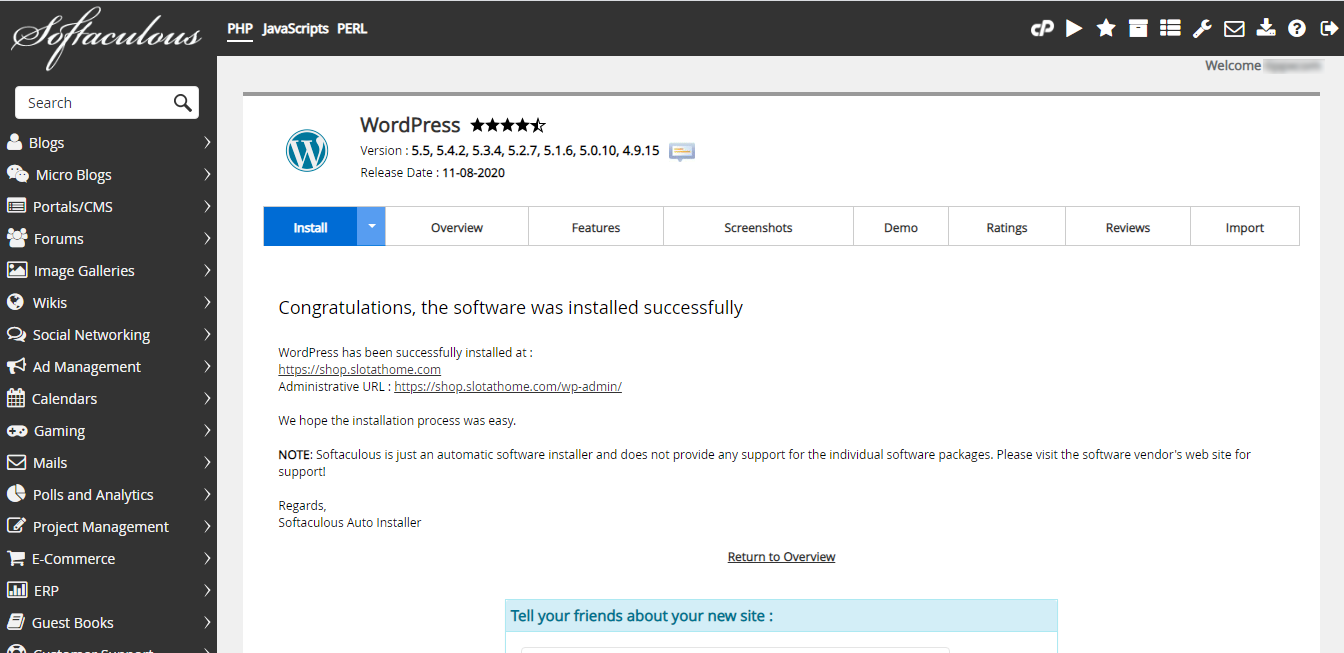
The installation of WordPress Manager has been successful. We can see information about the login page's URL address. By default, this login surface is in a directory of your domain: /wp-admin. It is visible in the picture too below. You will be able to log in to WordPress Manager from that address.

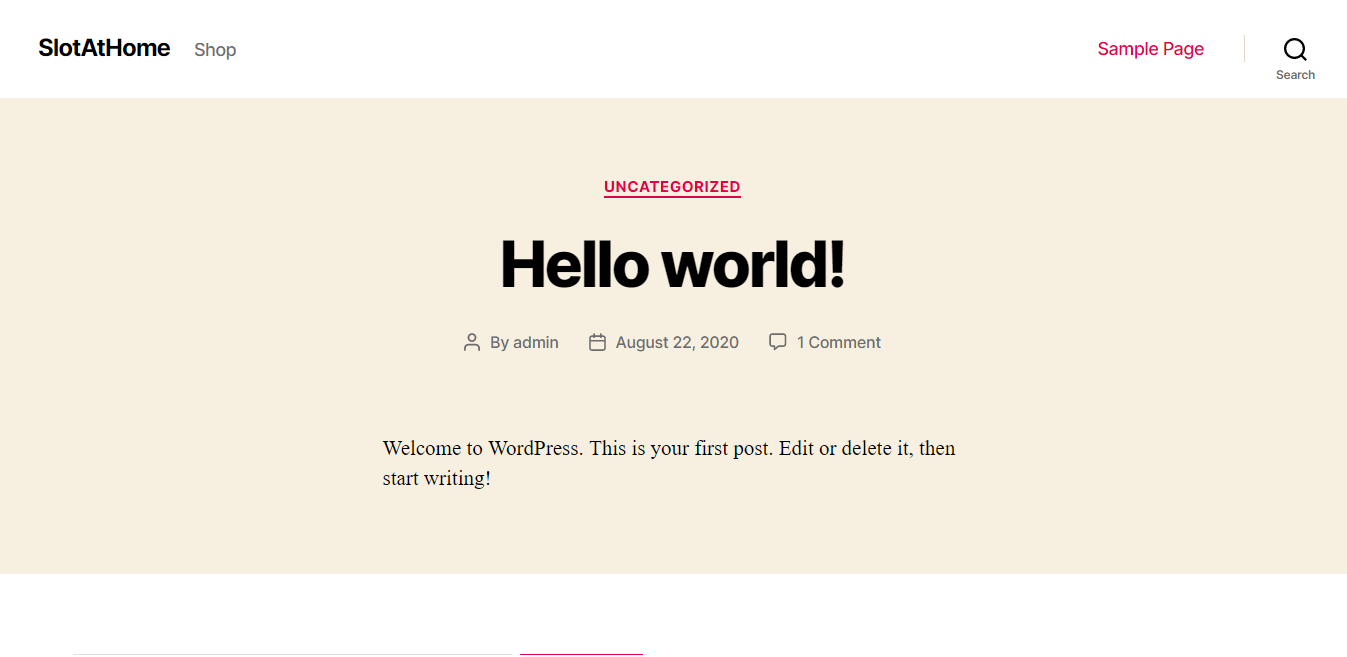
Now you can type in your domain name to your browser (like abcd.com), and you will see a basic WordPress blog template there.

-
Log in to WordPress Manager
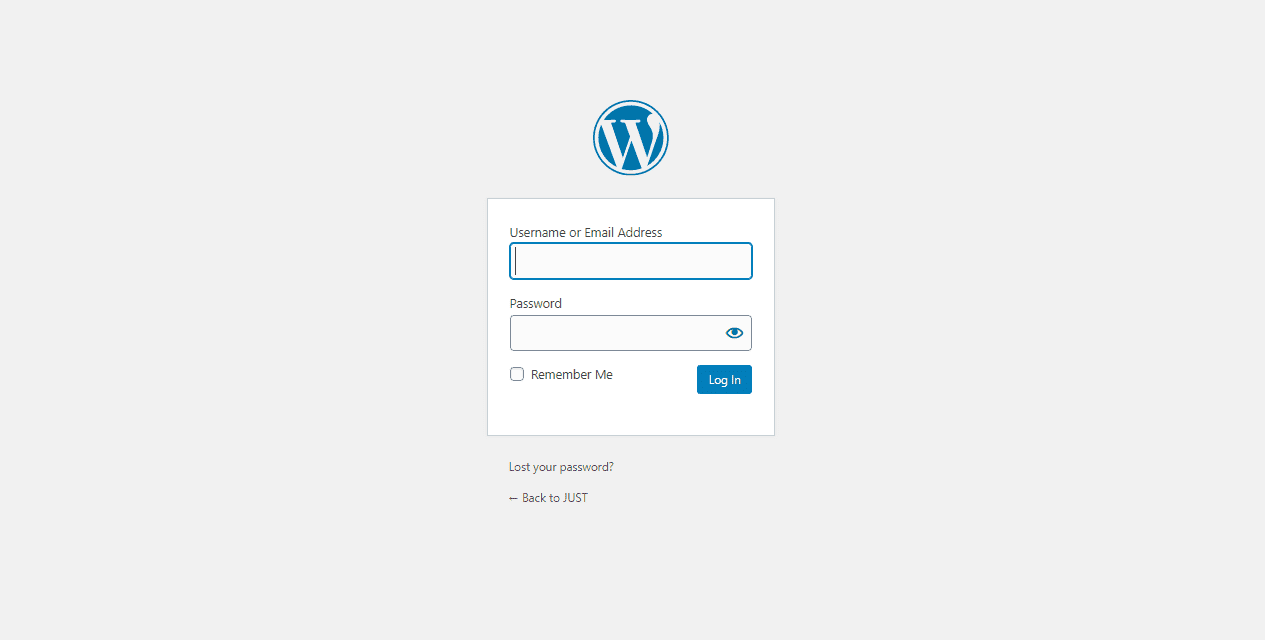
By default, you can reach the WordPress Manager log in page in a sub-folder of your domain: /wp-admin.
Use the username and password you created during WordPress installation.

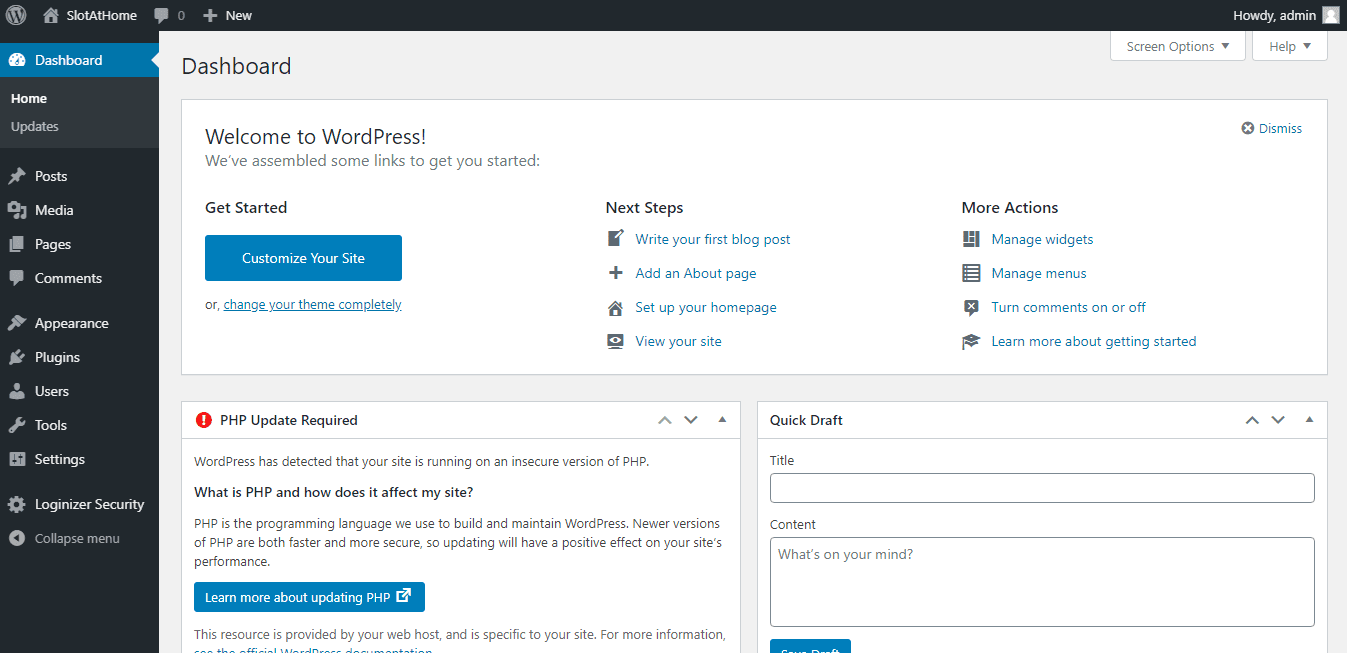
After logging in, you will see the WordPress Manager Dashboard.

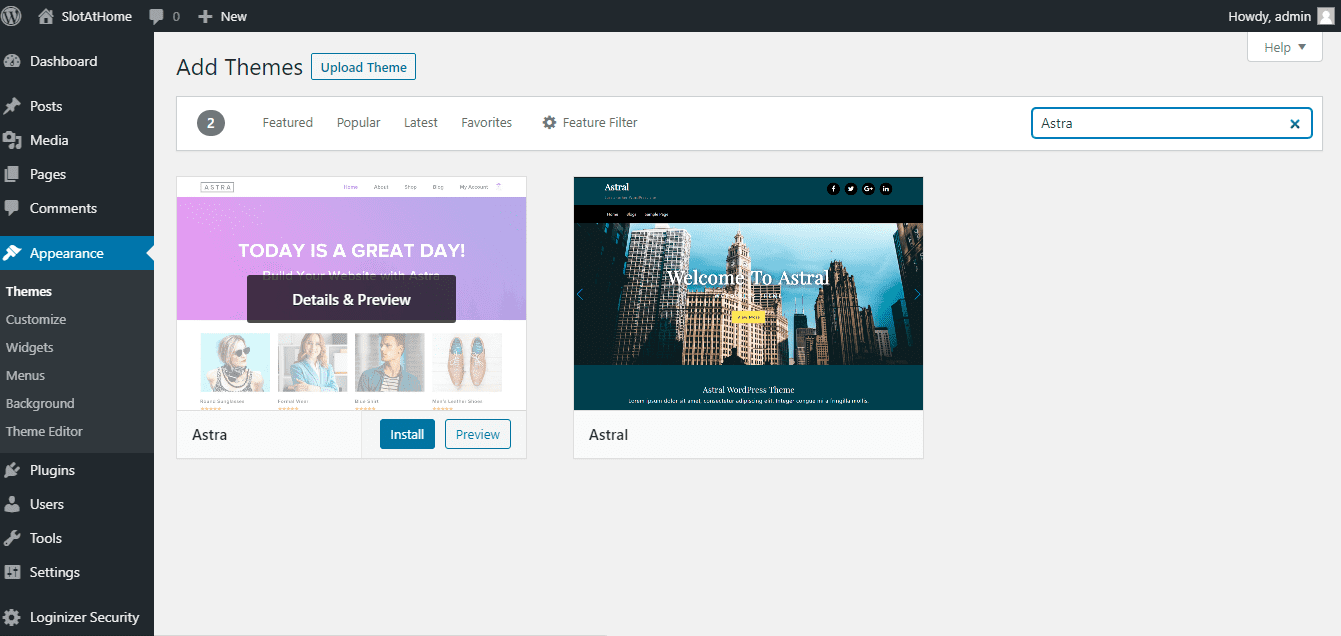
From the menu on the left, choose Appearance, and then Themes. You will see some basic themes that are installed by default.

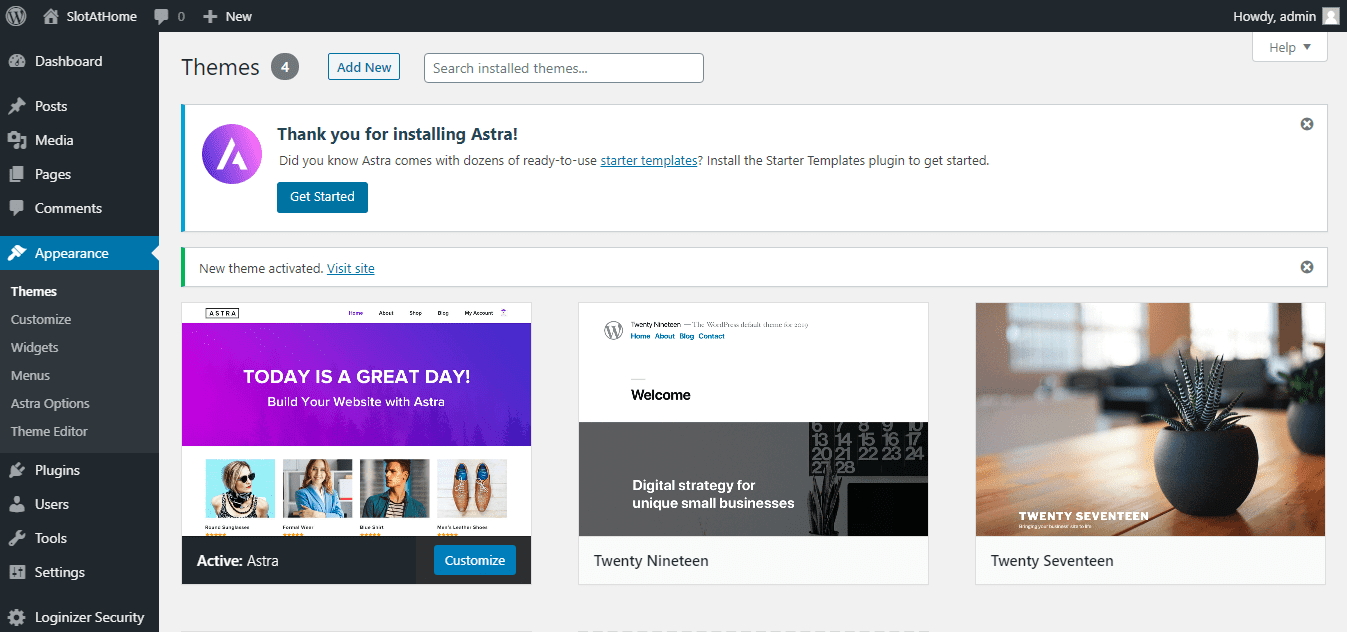
Click "Add new" then type in "Astra". It is the name of a free and comparatively easy to use webshop template. From the appearing results, choose Astra and click "Install".

After installation, the Astra WordPress webshop template will appear between your installed templates, with an activate button on it. Click that to activate Astra, and you will see a screen similar to this one below. Notice that a new menu item (Astra options) has added to the left menu under Appearance. In the top-middle of the screen, you will see "Thank you for installing Astra" welcome text and a button "Get started". Click that one.

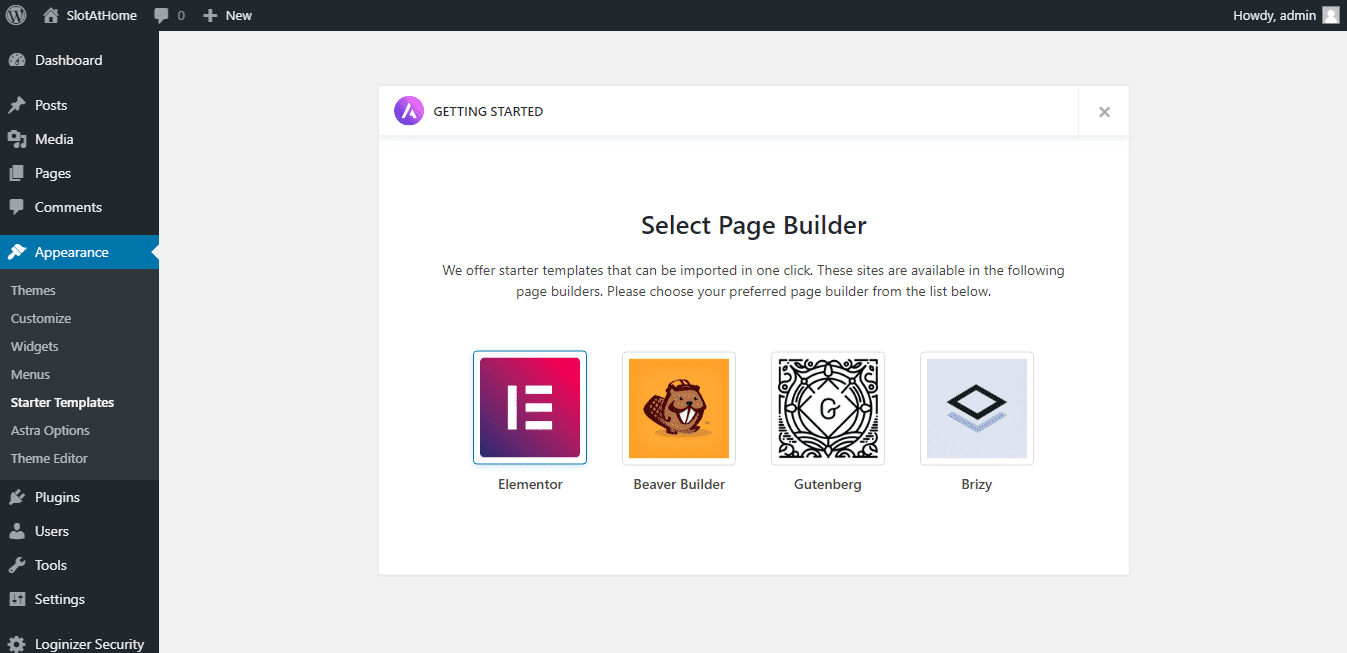
On the next screen, you have the option to choose a Page Builder. The WordPress itself have page builder functions, but some templates offer extra page builder for more functionality. Choose Elementor. It is free. It has a paid version too, but by clicking on it now, you will get the free version.

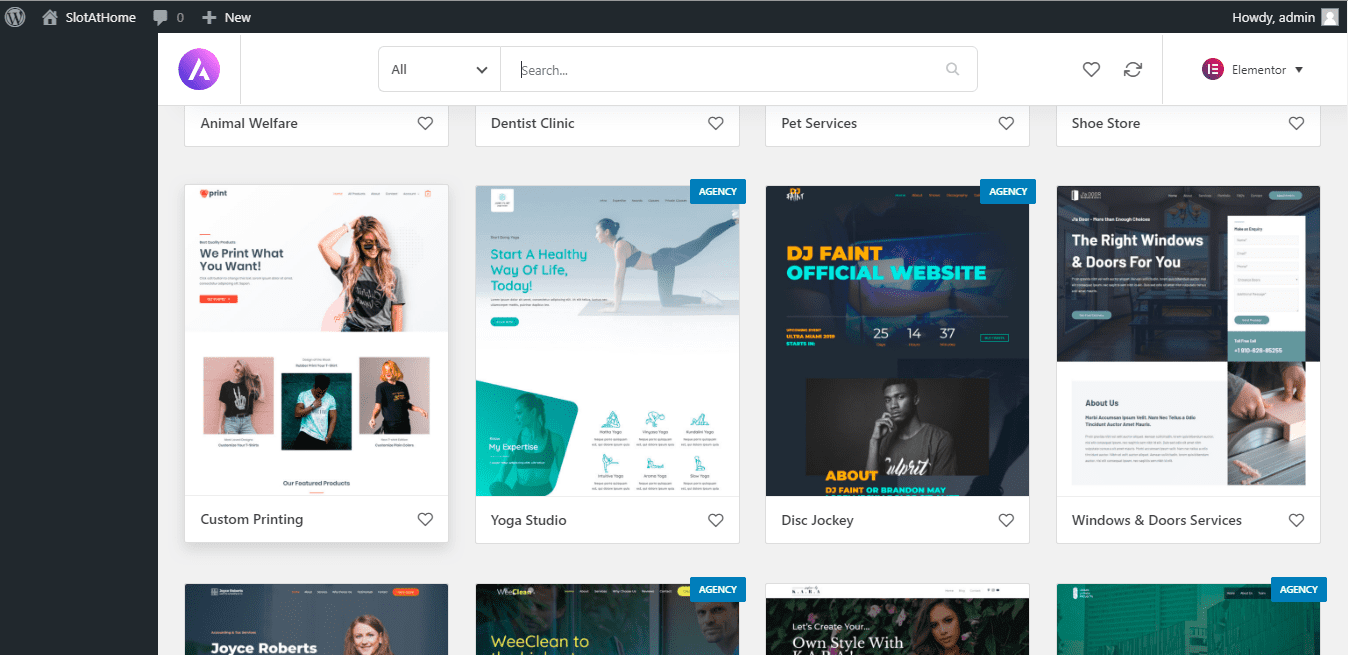
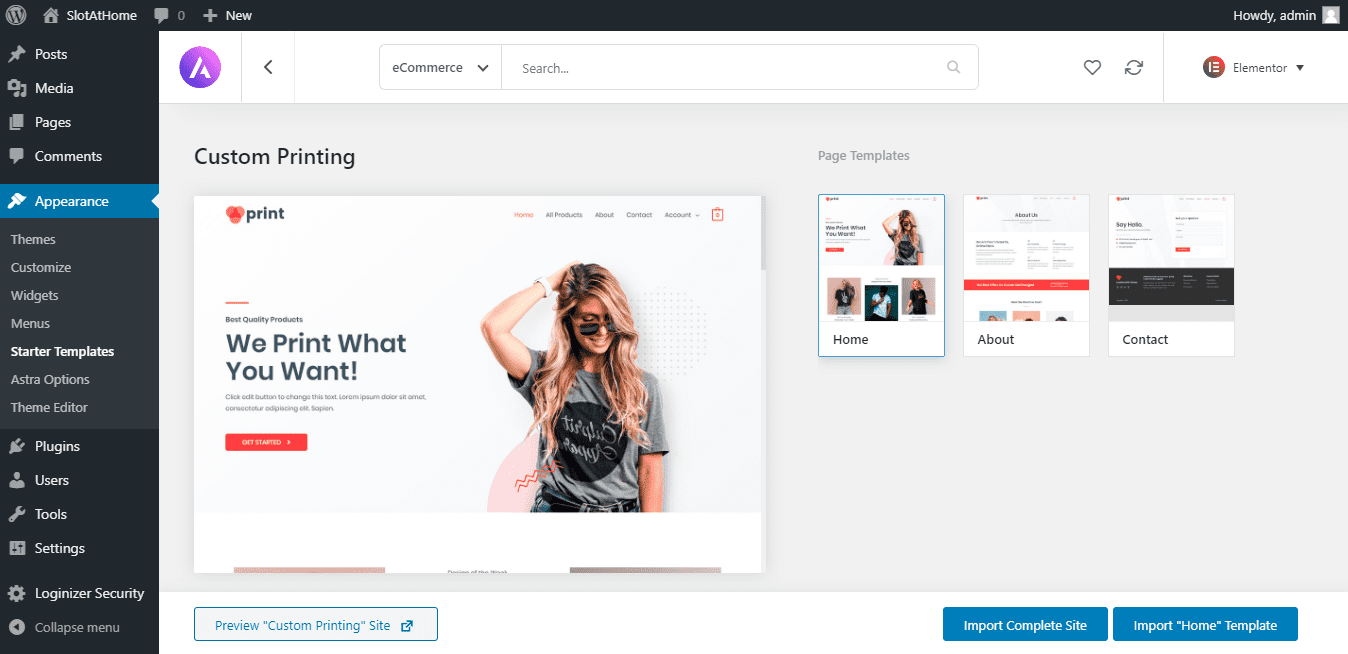
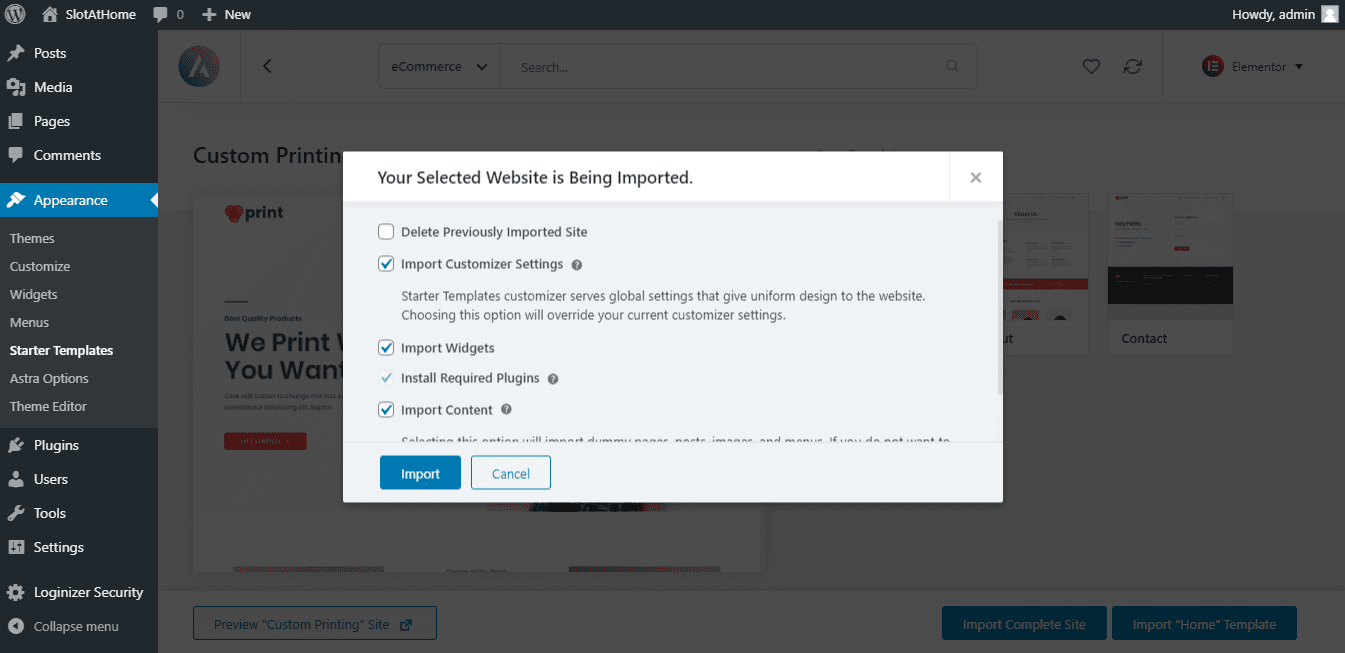
Right after this, you will have to choose a starter site by browsing or searching. If you choose the eCommerce option, then you will see the webshop templates of the Astra. Find the site template called "Print."

Click "Import Complete Site."

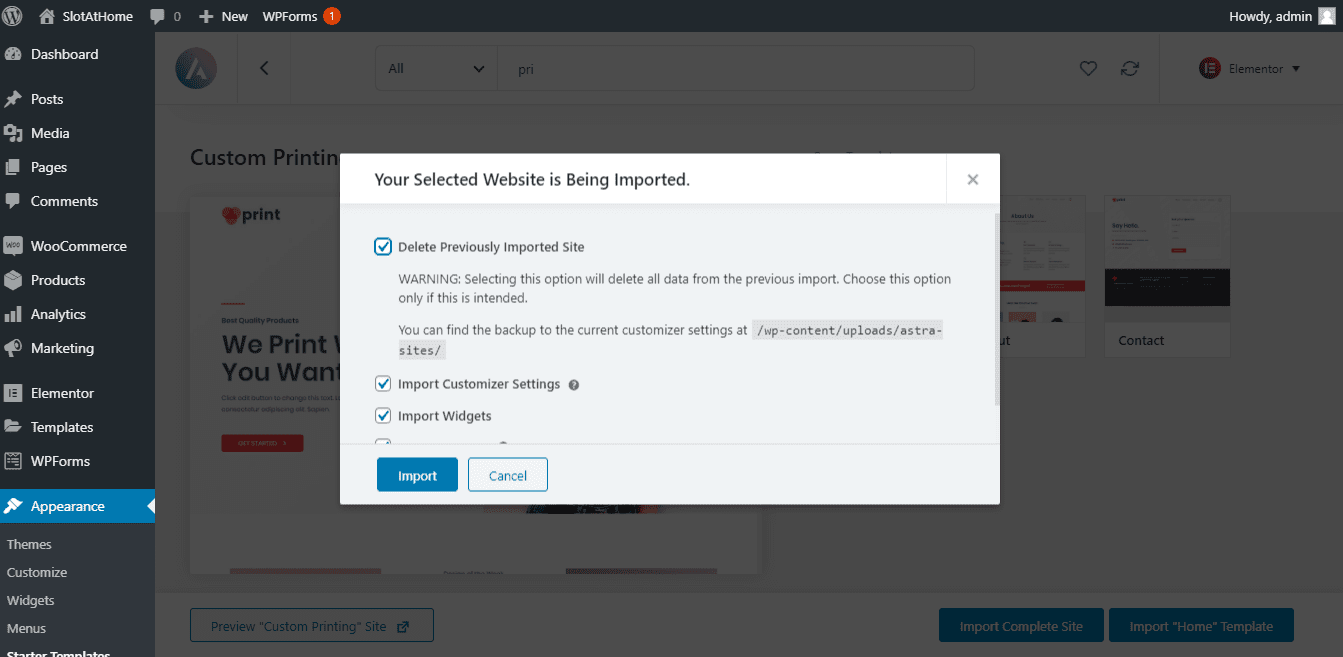
On the popping up window, tick the relevant boxes, like in the screenshot below.

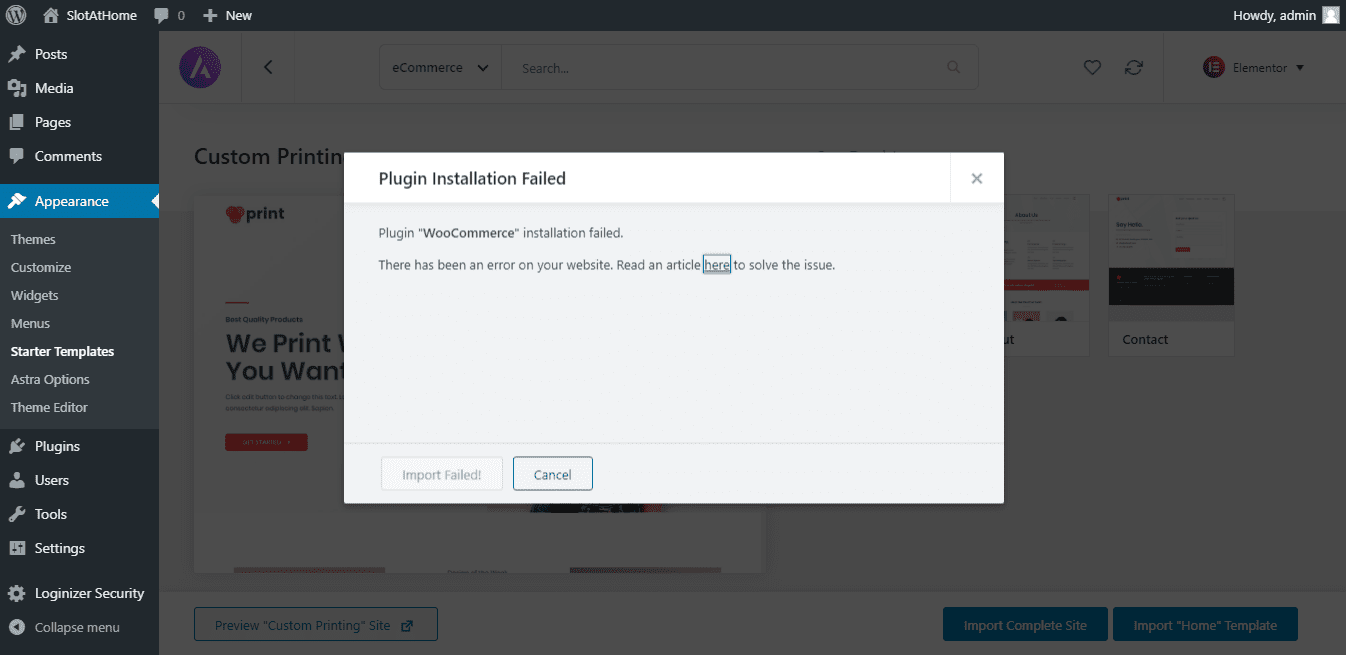
During import, errors can happen, and installation might not be successful for the first time. In this case, popup windows will notify you about the problems. In our case, there was a problem with our server's PHP version, so the WooCommerce plug-in installation was not successful. We have changed our PHP version from our domain's cPanel then we could install and activate the missing program. It might be necessary to start all importing over again and tick the box in the popup visible on the former screenshot to delete previous installations.
If you are lucky, you will not see the following screen.
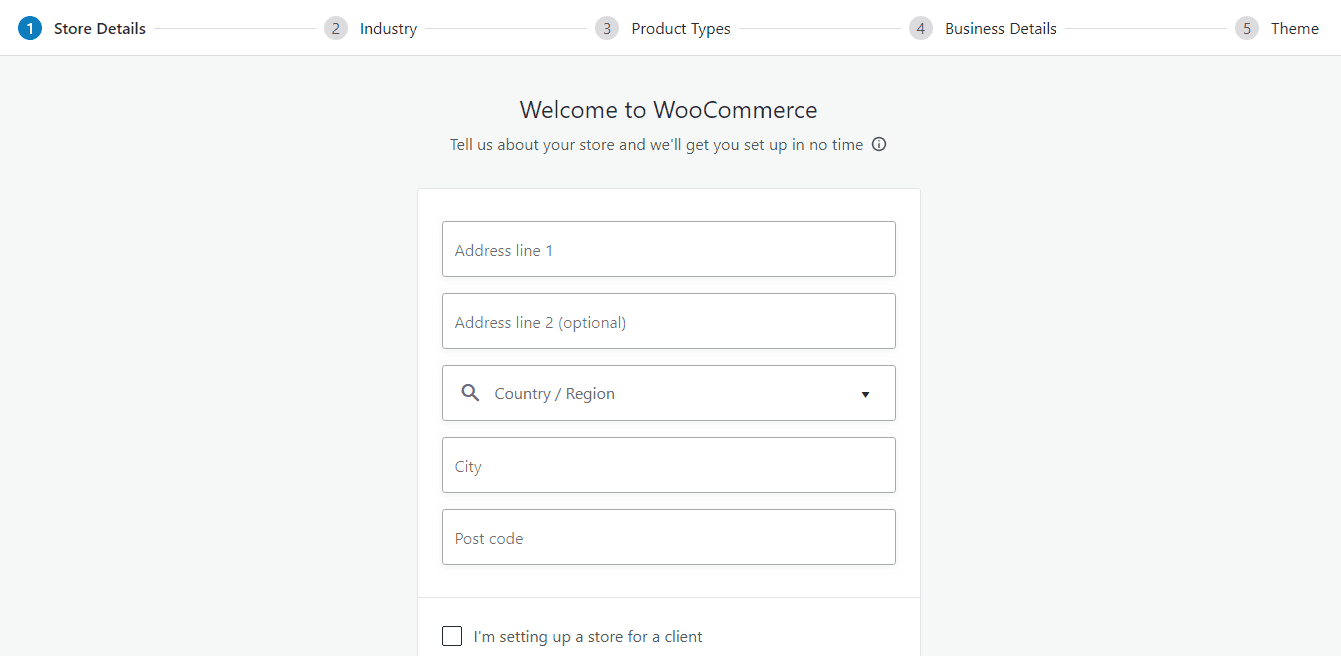
At activating the WooCommerce plug-in, a form appeared.

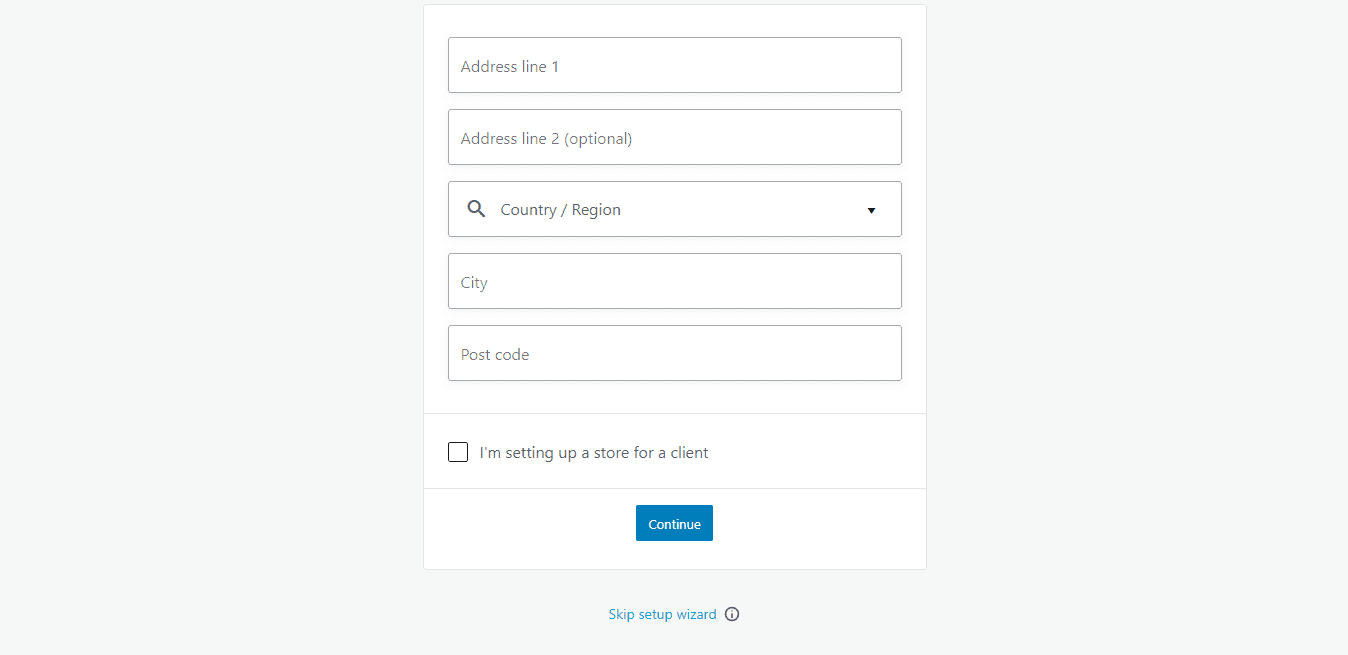
We have scrolled to the very bottom of the form and skipped it. You can fill these details up, or you can do it later, too, from "inside," as you wish.

The next popup notified us that the selected site is being imported.

There you go, your new webshop template has been installed. You already have your new webshop template on your domain. You can edit it mostly from two menu items in WordPress Manager: Customize or Edit with Elementor.

We have experienced some problems during the first editing with Elementor. At some point, the system notified us that going back to the basic WordPress customizer can cause data loss. We ignored it and got data loss. Because of this, we had to quickly start over the importing of the Print site, ticking a checkbox during installation to remove the former one. So, if you see the same notification about data loss, don't click there. Better click on the left side menu to go back to WordPress basic customizing features under the Appearance tab.

-
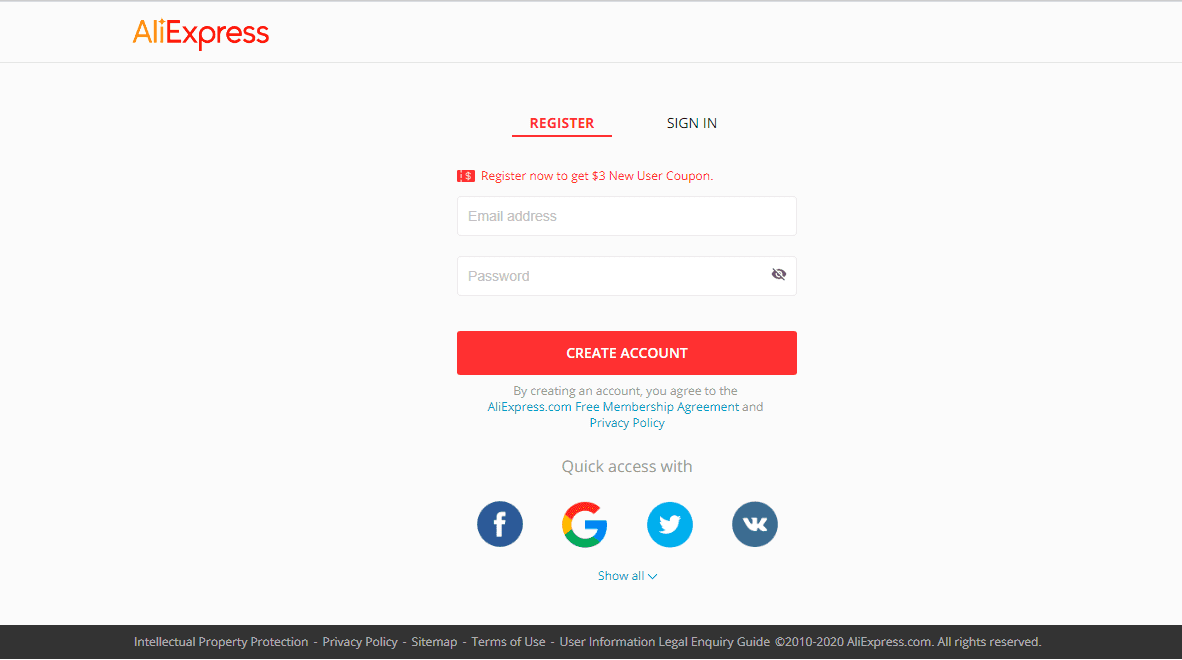
Register on AliExpress. Here is the Chinese stuff, the drop shippers.
For sign-up, go to AliExpress sign-up page.

-
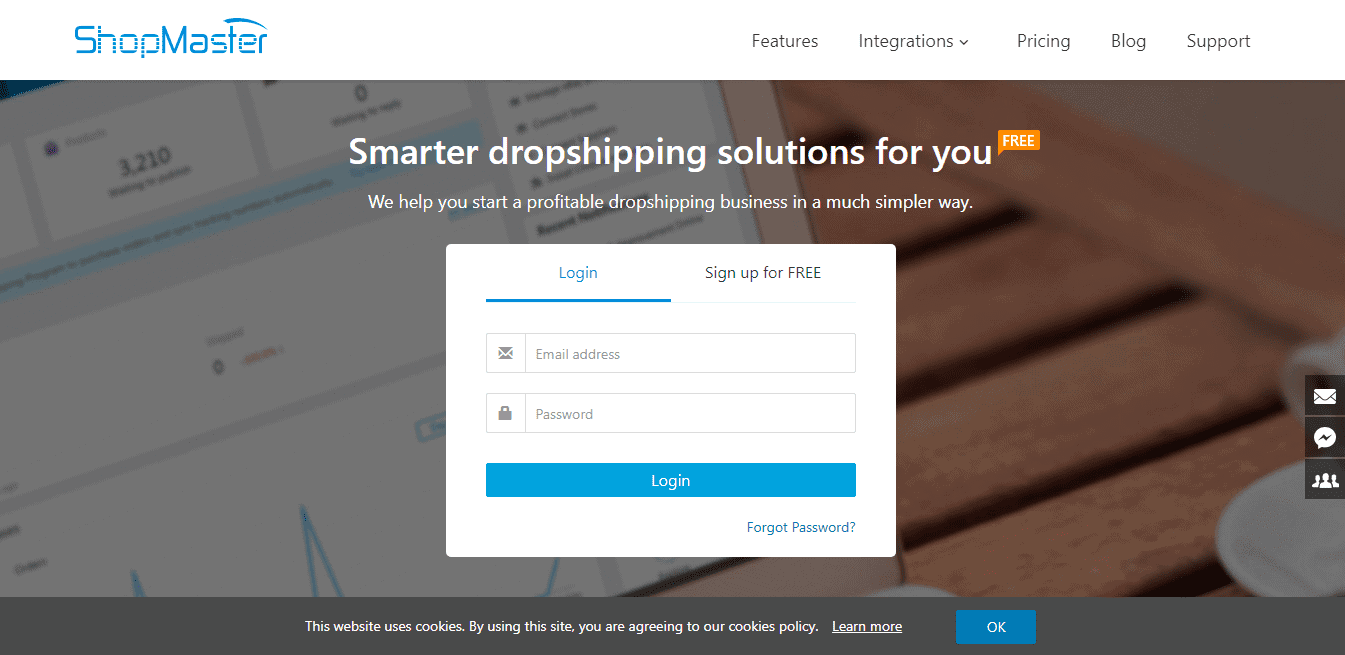
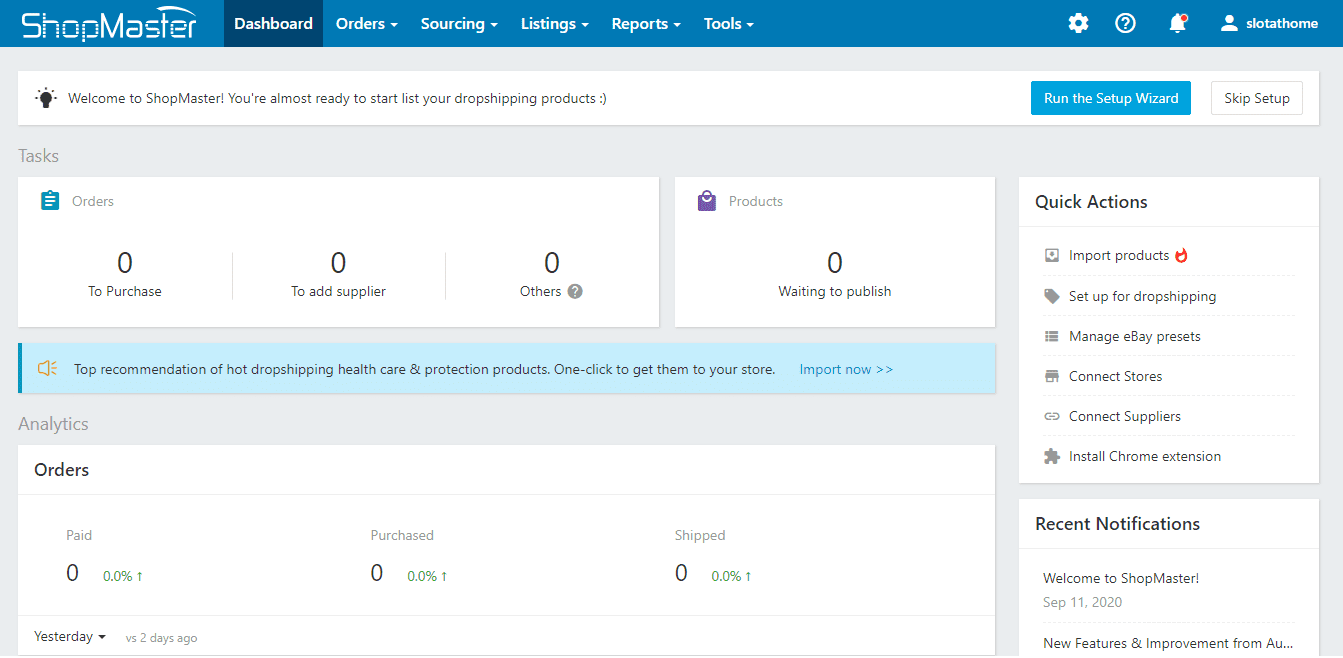
Sign-up on ShopMaster. It will link your webshop to AliExpress, so you will be able to order products automatically.

After creating your account, a Setup Wizard window will pop up. Skip it for now.
You can verify your email address. After these, you will see the dashboard.

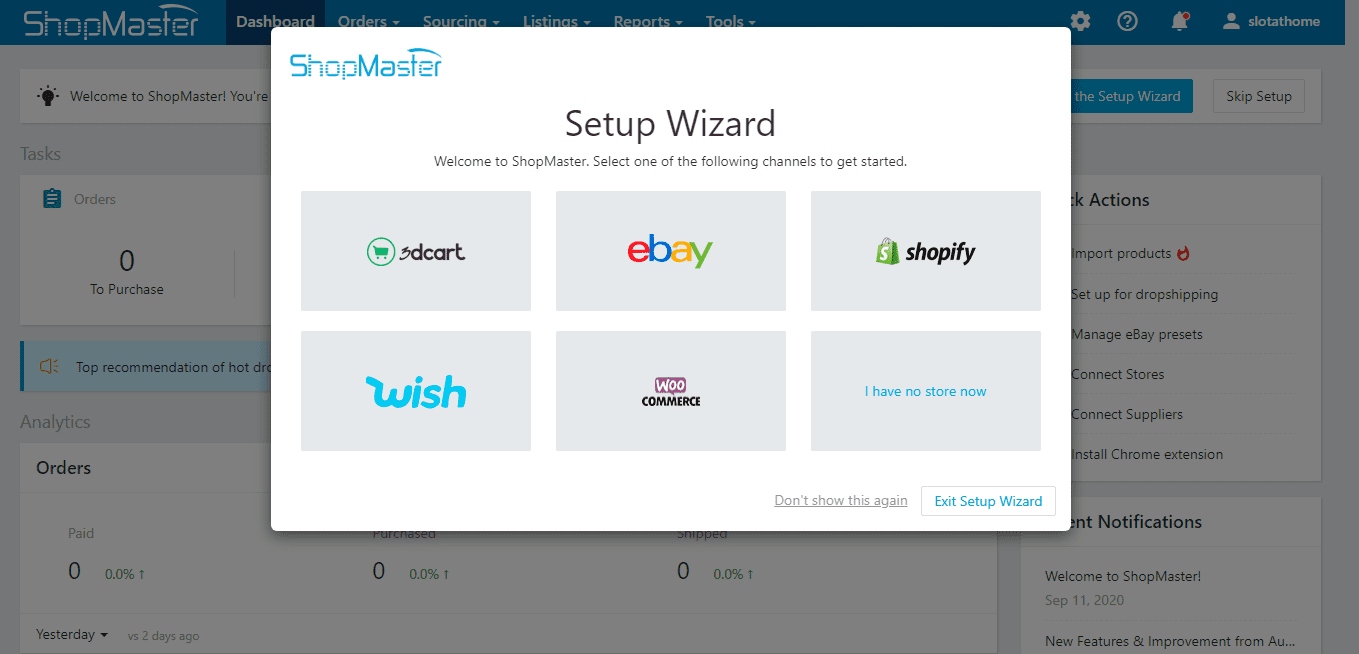
Now click on the "Run Setup Wizard" button on the top, or you can reach it from the menu that appears after clicking the question-mark icon.

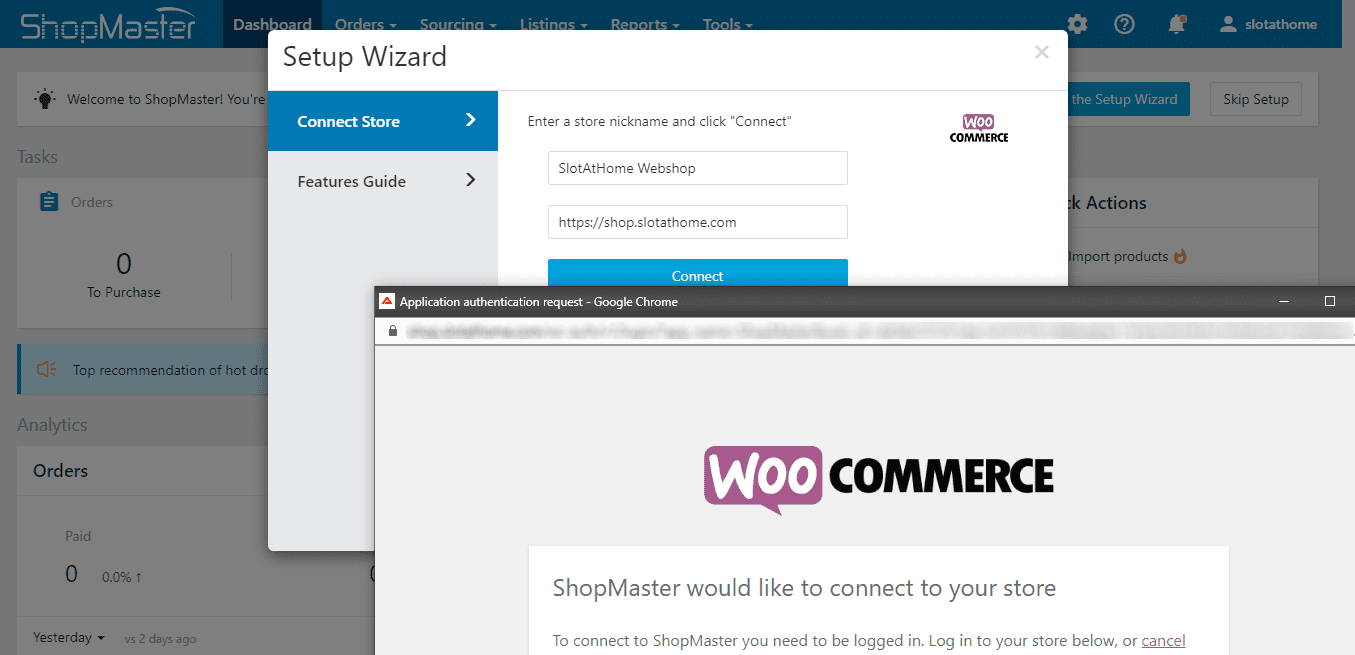
Choose the WooCommerce option. Fill out your webshop name and URL. Then a pop-up window will appear. You will need to give your log-in name and password for your WordPress Manager, then click "Approve."

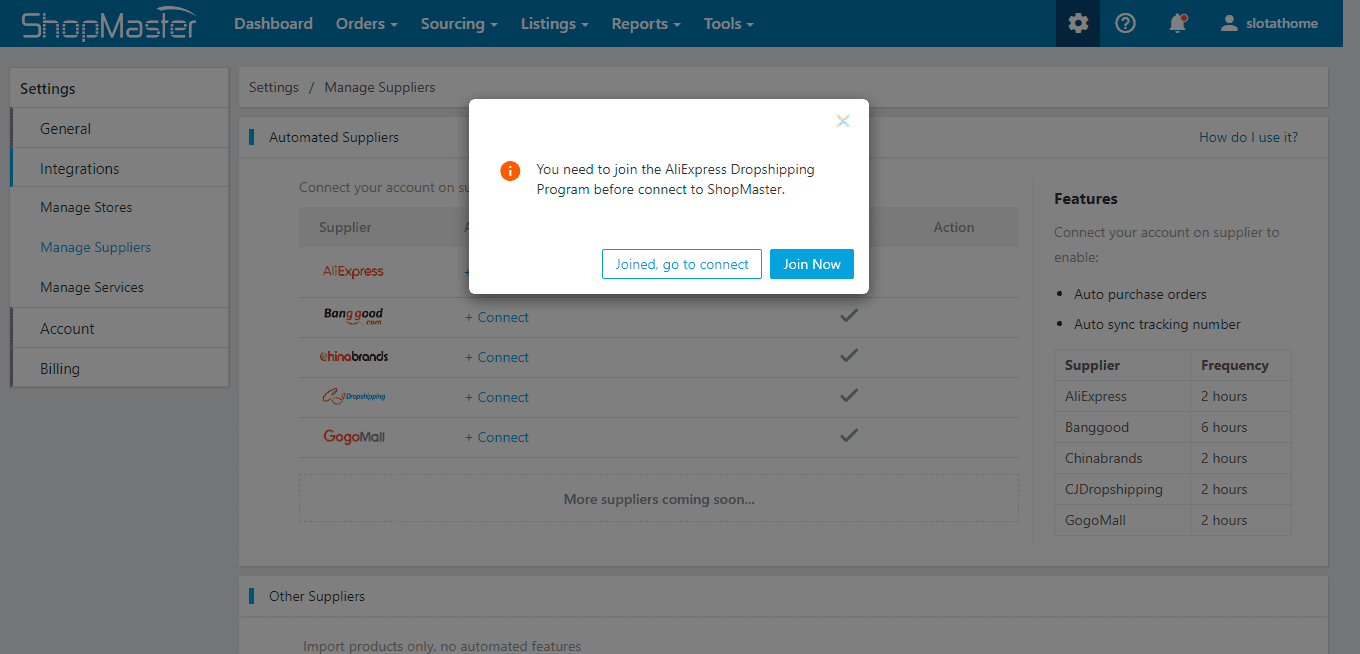
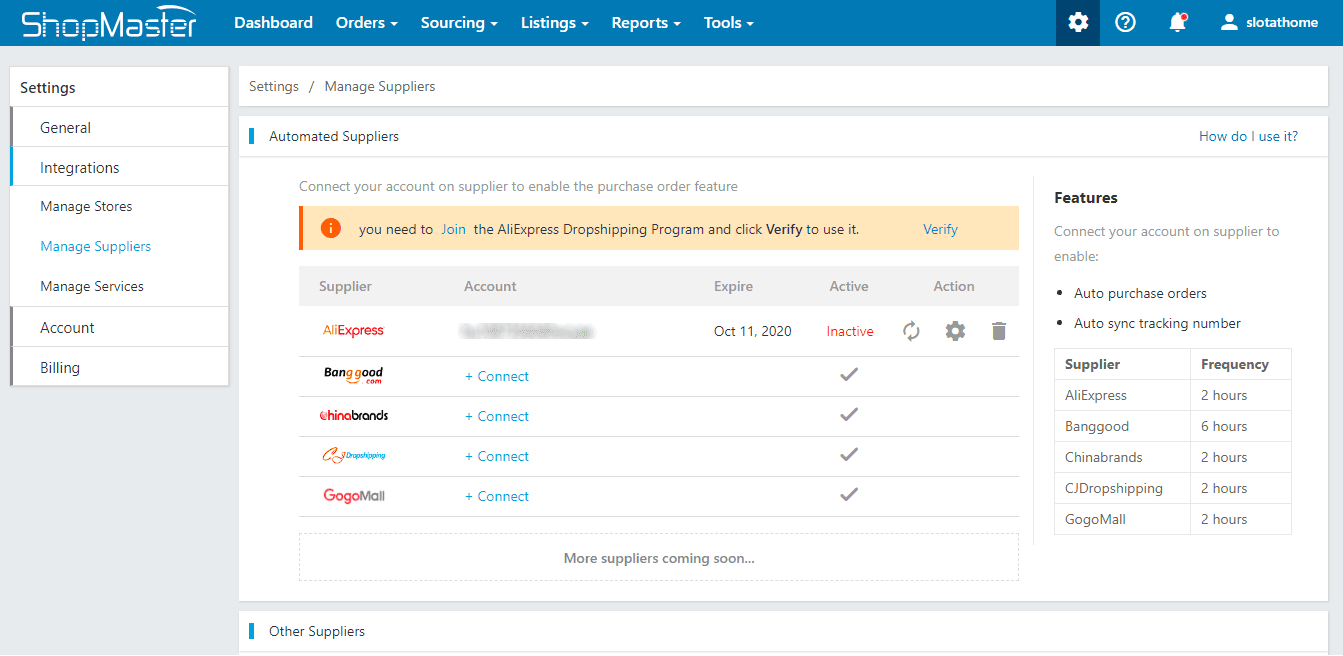
Now you see your ShopMaster Dashboard again. We need to set up some things here. Click on the Settings (gear icon) in the upper menu and choose "Manage Suppliers." You will see some suppliers on the appearing list, choose AliExpress, and click connect. A pop-up will appear, asking you to join AliExpress. We have already done that earlier, so click "Joined, go to connect."

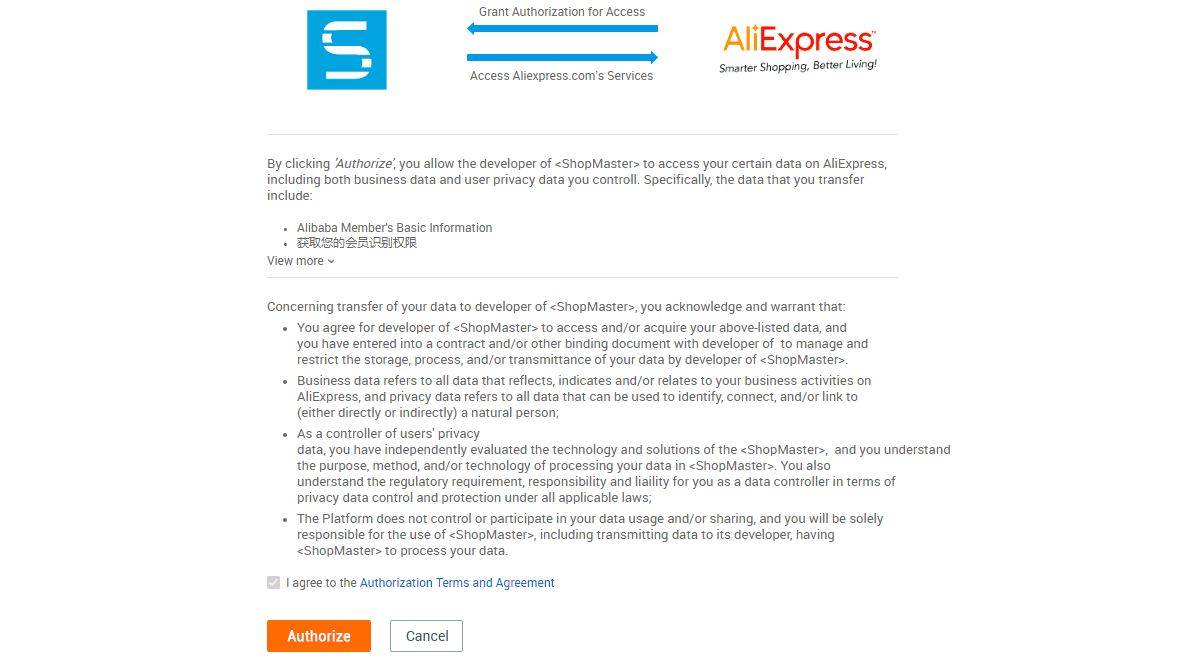
An AliExpress sign-in form and then an Authorization screen will appear, sign-in to AliExpress, and click "Authorize." This connection will expire after a month, so you will need to renew it from time to time in the future.

Now your AliExpress account is Connected to ShopMaster, but you can see some notification: "you need to Join the AliExpress Dropshipping Program and click Verify to use it."
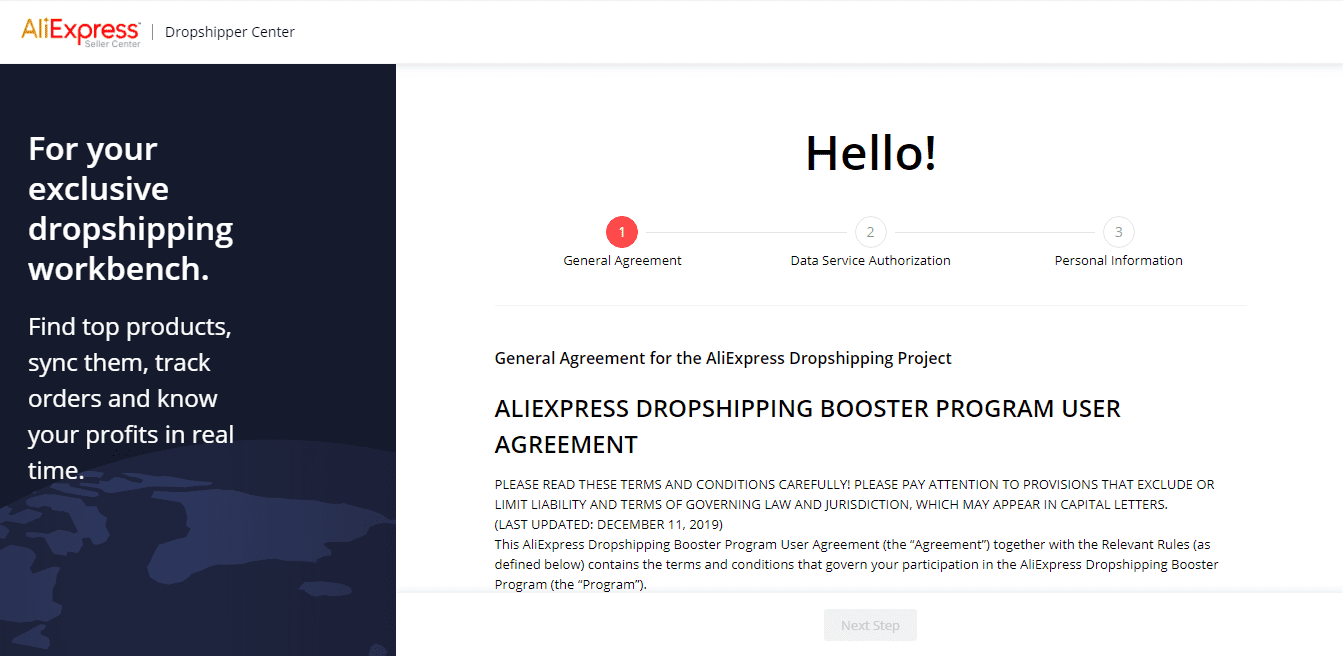
Click Join and then Verify there.
You need to read through a Dropshipping Agreement.

Now in ShopMaster, click "Manage Stores" on the left side menu. You will see your connected webshop details. Take a look at the currency, as it should be the same as it is in your WordPress Manager - WooCommerce - Settings - General menu. It is synchronizing automatically.
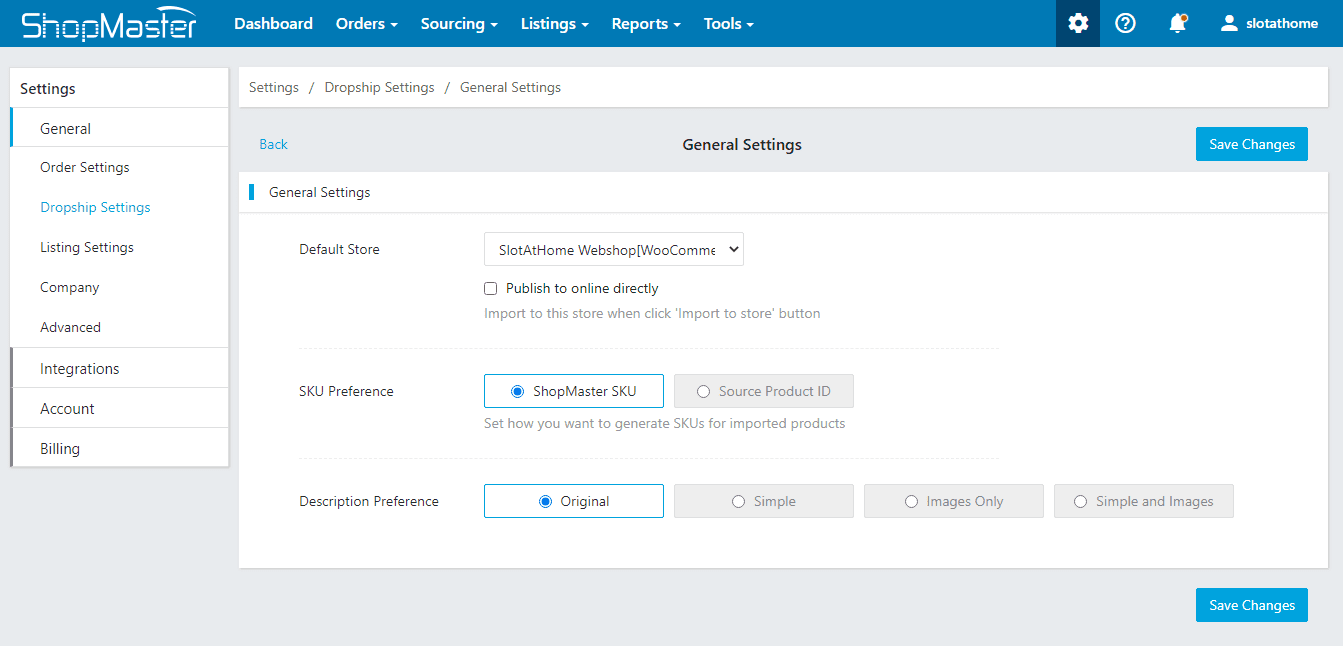
For the next thing to set up, go to Settings (gear icon) in your ShopMaster menu and choose "Dropship Settings," then inside that "General Settings." Change the "Default Store" to your webshop. Save changes with the blue button.

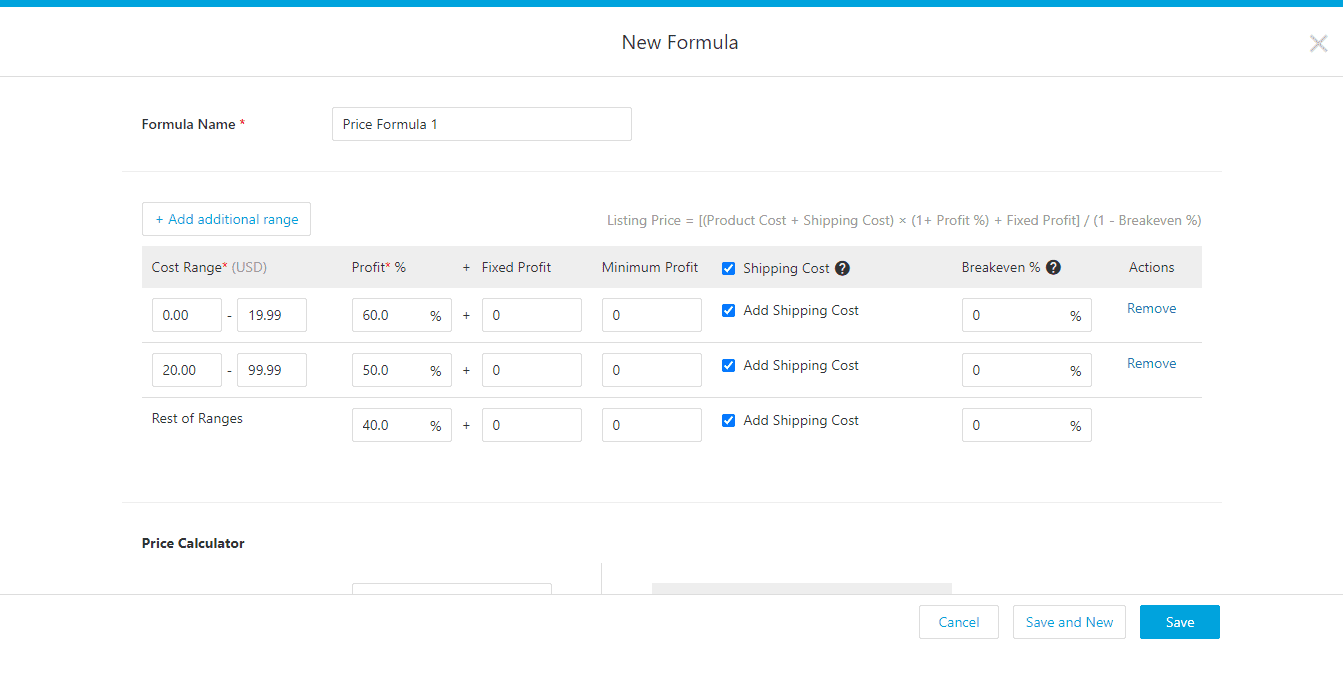
For the next thing to set up, go to Settings (gear icon) in your ShopMaster menu and choose "Dropship Settings," then inside that "Pricing Rules." Here you can set up your profit percentages. If you click a checkbox, the price that you show for your customers will include shipping costs too. This way, you can say "free shipping" for your customers.

Under the same "Dropship Settings," as in the last point above, go on "Products Monitor." Enable "Inventory Monitor" and "Price Monitor" options and set them up by your preference. Save the changes.
Next, in "Dropship Settings," go on "Auto Order Settings." Switch on "Auto Fulfillment." Change option "Override Phone Numbers" to "Override all orders" and give your phone number. This way supplier calls you instead of your customer if there is a problem with the order. To the "Purchase Note" field, write that it is a "Dropship item." Tick the box "Attach customer's note to purchase note."
Still, on the same page below, choose ePacket as the shipping method next to AliExpress supplier and save changes.
Still, on the "Dropship Settings" page, choose "Import Settings," and at "Shipping Methods," choose From China - To the USA - Via ePacket. You can change these to your preferences in case you sell outside of the USA.We are ready to import products.
At ShopMaster Dashboard, click "Import Products" on the right menu. Here you can search products, or find the "Import from link" option (for this, choose a product from the AliExpress website and use its link from the search bar of your browser) and place the products to your Import list, edit their description, etc. After the editing is complete, hit the "Import to Store" button. Then edit "Draft Listing" there and finally click "Publish."
To master all settings, one needs some exercise and patience as there are quite a lot of things to set up.
Now, at the ShopMaster Dashboard, the item has been placed on the list of our Active webshop-items. If you double-check it in your WordPress-WooCommerce surface, you will find the product there too. It means that the item is now present in your webshop.
One more important thing is to set up payment methods. For this, go to the WordPress Manager, choose WooCommerce from the left menu, choose Settings, then Payments tab.
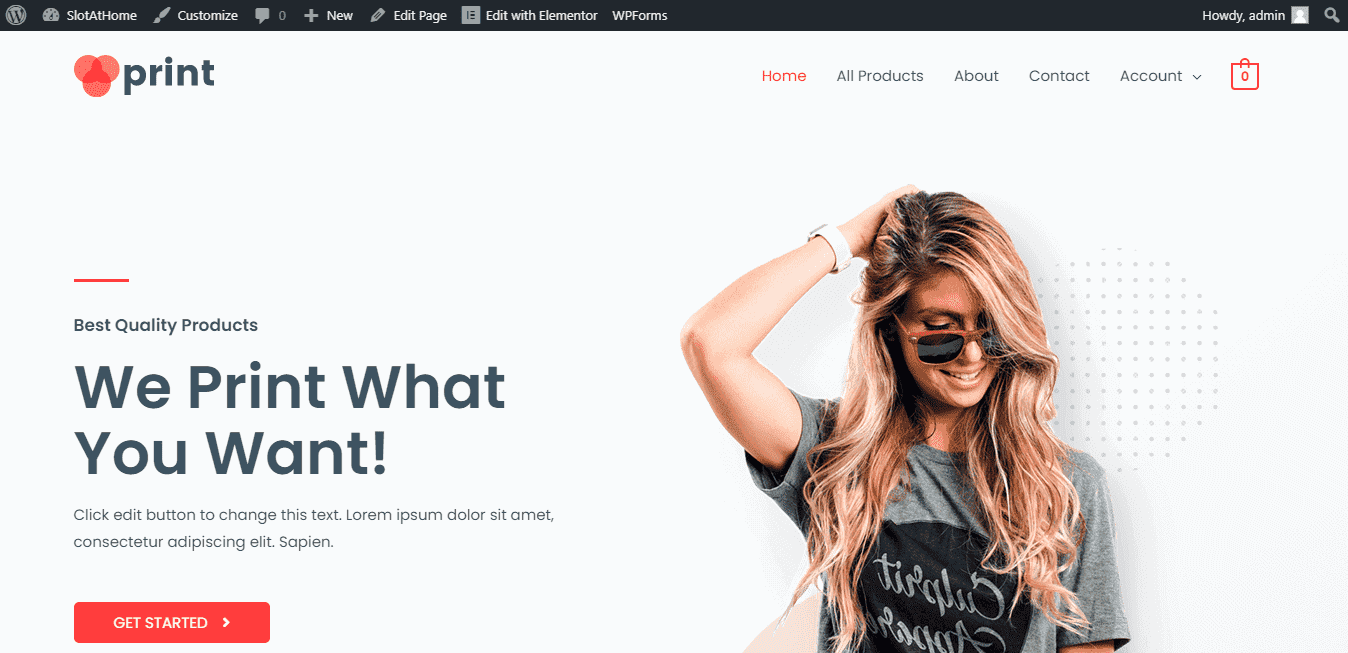
Have a look at our SlotAtHome Webshop that we created with the above-detailed method, on a subdomain of our domain, powered by WordPress - Astra Print webshop template and WooCommerce.
Other Ways to Sell Online
Sell your own Goods Online
If you don't want to use the advances of drop shipping, then plainly create a webshop and sell your own stuff on it. For this, please go back and read the above step-by-step manual about creating a webshop with dropshipping and follow steps 1-3.
Selling on eBay and Amazon
You can sell your own stuff - used or new - on e-marketplaces like eBay and Amazon, and you can use your account at these e-marketplaces as your dropshipping shop.
Registering on eBay and Amazon is easy. Just click on sign-up on their sites and follow the steps there. Here we are showing you a few basic features of them.
-
Selling on an auction
This option only exists on eBay. You - as a seller - have a starting price and duration of your auction and wait for the end of it. The highest bidder buys your product. -
Selling on a fixed price
This option is available on both Amazon and eBay. You give a fixed price and sell your stuff for the first customer that will click on the "Buy now" button. -
Selling used or new products
On eBay, you can sell anything, new or used. On Amazon, you can sell used stuff too, but there are product categories that can only sell as new. Such items are clothing, beauty products, etc.


